Mini Cannoli Cups- Delicious Easy Dessert Recipe
Mini Cannoli Cups are the answer to all your sweet cravings, delivering that beloved Italian indulgence in a perfectly portioned, utterly delightful package. Who can resist the siren song of crisp, golden shells encasing a cloud-like, creamy filling? These little wonders capture the essence of traditional cannoli without the fuss, making them an absolute showstopper for any occasion. What truly makes these Mini Cannoli Cups special is their inherent charm. They are miniature masterpieces, easily adaptable to various flavor profiles and decorations, allowing you to personalize them to your heart’s content. Whether you’re hosting a party, looking for an impressive dessert to share, or simply treating yourself, these Mini Cannoli Cups promise pure bliss in every bite.
Why You’ll Love These Mini Cannoli Cups:
A bite-sized taste of heaven!
Mini Cannoli Cups
If you’re craving the delightful crunch of a cannoli shell and the creamy sweetness of its ricotta filling but don’t want the fuss of rolling and frying dough, I have the perfect solution for you: Mini Cannoli Cups! These little wonders capture all the classic flavors of traditional cannoli in an unbelievably easy-to-make format. Using refrigerated pie crusts, we can create crisp, golden cups that are the perfect vessel for a luscious, homemade ricotta filling. They are ideal for parties, a special dessert, or whenever that cannoli craving strikes. You’ll be amazed at how professional these look and taste, all with minimal effort.
Ingredients:
Preparing the Ricotta Filling
The heart of any cannoli is its filling, and ours is no exception. This part is incredibly simple and yields a wonderfully smooth and flavorful cream.
Creating the Cannoli Cups
This is where the magic happens, transforming simple pie crusts into adorable edible cups.
Baking and Assembling
The final steps to achieving your delicious Mini Cannoli Cups.
These Mini Cannoli Cups are best enjoyed the same day they are assembled for the crispiest shells. However, you can prepare the ricotta filling and bake the pie crust cups a day in advance and store them separately. Assemble just before serving to maintain that delightful texture. Enjoy every bite of this easy, delightful twist on a classic Italian dessert!

Conclusion:
So there you have it – your guide to creating these absolutely delightful Mini Cannoli Cups! This recipe is truly a winner because it delivers all the classic, irresistible flavors of traditional cannoli in a wonderfully convenient and approachable format. The crisp, buttery shells paired with the creamy, sweet ricotta filling are a match made in heaven. They’re perfect for parties, a sweet treat after dinner, or even just a delightful afternoon indulgence.
When it comes to serving, these mini delights are incredibly versatile. They look stunning on a dessert platter alongside other small bites, or you can serve them individually as an elegant finish to any meal. For variations, don’t be afraid to experiment! You can add a touch of citrus zest like orange or lemon to the filling, or even incorporate mini chocolate chips or finely chopped pistachios for added texture and flavor. I really encourage you to give this Mini Cannoli Cups recipe a try – I promise it’s a rewarding and delicious experience!
Frequently Asked Questions:
Can I make the cannoli shells ahead of time?
Yes, you absolutely can! Once cooled and completely dry, the shells can be stored in an airtight container at room temperature for up to 2-3 days. Just be sure to fill them shortly before serving to maintain their crispness.
What if I don’t have mini muffin tins?
No worries! You can adapt this recipe for a regular muffin tin, creating larger cannoli cups. You might need to adjust the baking time slightly, so keep an eye on them until they’re golden brown and crisp.
Can I substitute the ricotta cheese?
While ricotta is traditional, you could experiment with a drained mascarpone cheese for a richer filling, or a combination of both. Ensure any substitute is well-drained to avoid a watery filling.
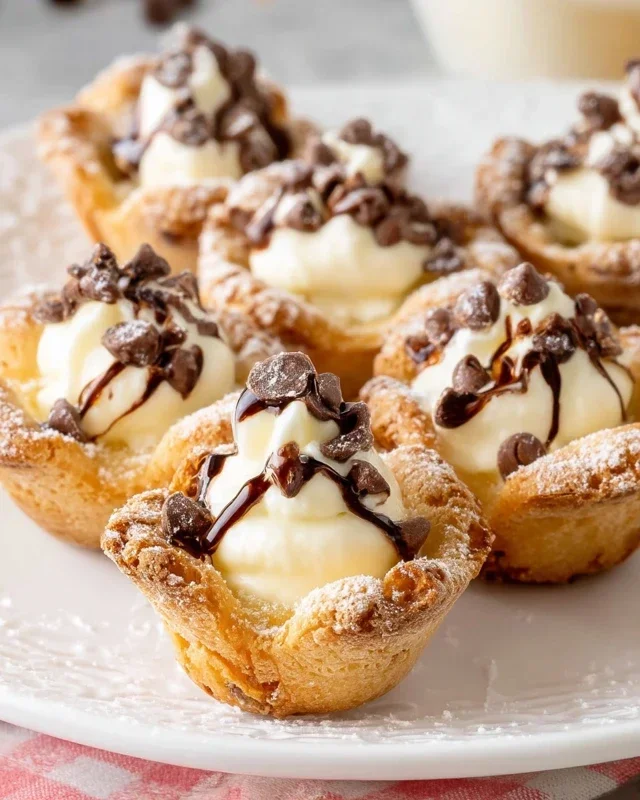
Mini Cannoli Cups
Delightful mini cannoli cups featuring a creamy ricotta filling nestled in crisp pie crust shells, dusted with cinnamon-sugar and finished with chocolate chips or pistachios.
Ingredients
-
1 container whole-milk ricotta cheese (15 oz., drained)
-
1/2 cup powdered sugar
-
2 tablespoons granulated sugar
-
1 teaspoon finely grated orange or lemon zest
-
1/2 teaspoon vanilla extract
-
1 box refrigerated pie crusts, softened as directed on box (2 count )
-
3 tablespoons turbinado sugar (raw sugar)
-
1 teaspoon ground cinnamon
-
1/4 cup miniature semisweet chocolate chips or finely chopped pistachios
-
additional powdered sugar
Instructions
-
Step 1
Preheat oven to 375°F (190°C). Grease and flour a 12-cup muffin tin. -
Step 2
In a medium bowl, combine the drained ricotta cheese, 1/2 cup powdered sugar, 2 tablespoons granulated sugar, orange or lemon zest, and vanilla extract. Stir until smooth and well combined. -
Step 3
Unroll the refrigerated pie crusts. Cut each crust into 6 equal circles (you can use a round cookie cutter or a glass). Press the crust circles into the greased muffin tin cups, forming little shells. -
Step 4
Bake for 10-12 minutes, or until the crusts are golden brown and slightly crisp. Let the cups cool in the muffin tin for a few minutes before carefully transferring them to a wire rack to cool completely. -
Step 5
In a small bowl, combine the turbinado sugar and ground cinnamon. Mix well. -
Step 6
Once the pie crust cups are completely cool, spoon or pipe the ricotta filling into each cup. Sprinkle with the cinnamon-sugar mixture. -
Step 7
Garnish the filled cannoli cups with miniature chocolate chips or finely chopped pistachios. Dust with additional powdered sugar just before serving, if desired.
Important Information
Nutrition Facts (Per Serving)
It is important to consider this information as approximate and not to use it as definitive health advice.
Allergy Information
Please check ingredients for potential allergens and consult a health professional if in doubt.