Crispy Baked Zucchini Chips-Easy Healthy Snack
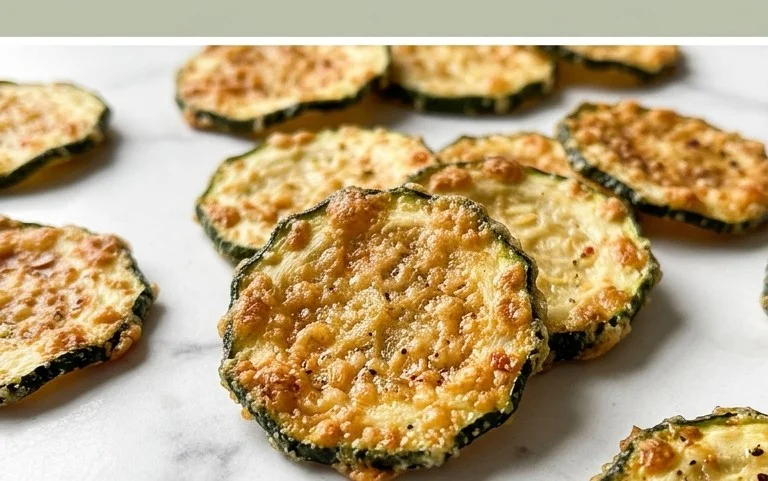
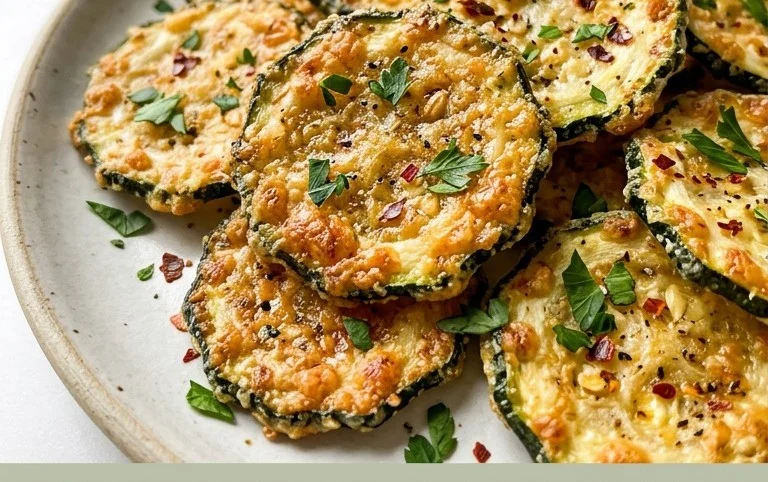
Crispy Baked Zucchini Chips are about to become your new favorite guilt-free snack. Forget those greasy, store-bought alternatives; we’re talking about a vibrant, fresh, and incredibly satisfying way to enjoy a bounty of summer squash. If you’ve ever found yourself staring at an abundance of zucchini and wondering what to do with it, these crispy baked zucchini chips are your answer. What makes them so special? It’s the magical transformation that happens in the oven: thin slices of zucchini, kissed with just the right amount of seasoning and oil, emerge golden, delightfully crunchy, and surprisingly addictive. We love them because they offer that irresistible crunch without the deep-fried calories, making them perfect for dipping, snacking, or even as a delightful side dish that everyone will ask you for the recipe for.
Crispy Baked Zucchini Chips
Looking for a healthy and delicious way to enjoy zucchini? These crispy baked zucchini chips are the answer! Forget the greasy fried versions; this recipe delivers all the satisfying crunch with a fraction of the oil and none of the guilt. They’re perfect as a light appetizer, a satisfying snack, or even a fun side dish that even picky eaters will love. The key to getting them perfectly crispy lies in the preparation and baking technique, and I’m going to walk you through every step to ensure your success. Get ready to transform humble zucchini into a gourmet treat that’s surprisingly easy to make.
Ingredients:
Instructions:
Preparing the Zucchini: The Secret to Crispiness
The first and most crucial step to achieving truly crispy zucchini chips is to manage their moisture content. Zucchini is naturally high in water, and if we don’t remove some of that before baking, we’ll end up with soggy chips.
Creating the Flavorful Coating
While the zucchini is busy releasing its moisture, we’ll prepare the delicious coating that will give our chips their irresistible flavor and texture.
- In a medium bowl, combine the panko breadcrum extractbs, grated Parmesan cheese, and the 1/4 teaspoon of salt. Stir everything together until well combined. Panko breadcrum extractbs are essential here because their coarse texture creates an extra-crispy coating, much better than regular breadcrum extractbs. The Parmesan cheese adds a savory, slightly nutty flavor that pairs beautifully with the mild zucchini.
- In a separate shallow bowl or plate, pour your 1.5 tablespoons of olive oil. This is where we’ll lightly coat each zucchini slice before dredgin extractg it in the breadcrum extractb mixture. You don’t want to drench the zucchini in oil; a light coating is all that’s needed.
- Preheat your oven to 400°F (200°C). Line two large baking sheets with parchment paper. This is crucial to prevent sticking and make cleanup a breeze. Working with one zucchini slice at a time, lightly brush or dip each side into the olive oil. Then, press each oiled slice firmly into the panko and Parmesan mixture, ensuring it’s well coated on both sides. You want to make sure you’re pressing the coating onto the zucchini to help it adhere. Place the coated zucchini slices in a single layer on the prepared baking sheets, making sure they are not overlapping. Overlapping will steam the chips instead of allowing them to crisp up.
- Bake for 18-25 minutes, or until the zucchini chips are golden brown and crispy. The exact baking time will depend on your oven and how thinly you sliced the zucchini. About halfway through the baking time (around the 10-12 minute mark), carefully flip the zucchini chips using a spatula. This ensures even browning and crisping on both sides. Keep a close eye on them in the last few minutes of baking, as they can go from perfectly crisp to burnt very quickly. You’re looking for a beautiful golden-brown hue and a firm texture.
- Allow the zucchini chips to cool on the baking sheets for a few minutes. They will continue to crisp up as they cool. Serve them warm with your favorite dipping sauce. The suggested Greek yogurt ranch is a fantastic, lighter alternative to traditional ranch, but feel free to experiment with other dips like marinara sauce, a spicy aioli, or even a simple lemon-herb dip. These chips are best enjoyed fresh, but leftovers can be stored in an airtight container at room temperature for a day or two, though they might lose some of their crispness.
-
2 medium zucchini (sliced into 1/8″ rounds; see note 2)
-
1.5 tablespoons olive oil
-
1/3 cup panko breadcrumbs
-
1/3 cup grated parmesan cheese
-
1/4 teaspoon salt
-
Greek yogurt ranch (for dipping (optional))
-
Step 1
Preheat your oven to 400°F (200°C). Line a baking sheet with parchment paper. -
Step 2
In a bowl, toss the sliced zucchini with olive oil until evenly coated. -
Step 3
In a separate shallow dish, combine panko breadcrumbs, grated parmesan cheese, and salt. -
Step 4
Dip each zucchini slice into the breadcrumb mixture, ensuring both sides are well-coated. -
Step 5
Arrange the coated zucchini slices in a single layer on the prepared baking sheet. -
Step 6
Bake for 15-20 minutes, flipping halfway through, until golden brown and crispy. -
Step 7
Serve immediately with Greek yogurt ranch for dipping, if desired.
Coating and Baking to Perfection
Now for the fun part – coating the zucchini and getting them into the oven!
Serving Your Crispy Delights
Once they’re out of the oven, resist the temptation to eat them all immediately (though it will be hard!).
Enjoy your delicious, homemade crispy baked zucchini chips! They are a testament to how simple ingredients can transform into something truly special.
Conclusion:
I hope you’re as excited as I am to try these Crispy Baked Zucchini Chips! This recipe is a game-changer for anyone looking for a healthy and incredibly satisfying snack. It transforms humble zucchini into a crunchy, flavorful delight that’s miles ahead of greasy potato chips. The simplicity of the ingredients and the hands-off baking process make it perfect for busy weeknights or as an impressive appetizer. They’re wonderfully versatile, offering a light and guilt-free way to enjoy something deliciously crisp.
These chips are fantastic on their own, but they also pair beautifully with a variety of dips. Think creamy ranch, zesty garlic aioli, a spicy sriracha mayo, or even a cool tzatziki. For a more substantial meal, crum extractble them over salads for added texture or serve them alongside grilled chicken or fish. Don’t be afraid to experiment with seasonings too! A sprinkle of smoked paprika, a dash of cayenne for heat, or a blend of Italian herbs can all take these Crispy Baked Zucchini Chips to the next level.
I truly encourage you to give this recipe a go. You might be surprised at how easy it is to achieve that perfect crispness without frying. It’s a fantastic way to use up excess zucchini and a healthy snack the whole family will love. Happy baking!
Frequently Asked Questions:
Why aren’t my zucchini chips crispy?
Several factors can contribute to less-than-crispy chips. Ensure your zucchini slices are very thin and uniform in thickness. Pat them thoroughly dry after slicing to remove excess moisture, as this is crucial for crisping. Don’t overcrowd the baking sheet; give each chip ample space for air circulation. Baking at the correct temperature and for the right amount of time, flipping halfway through, is also key. Sometimes, a slightly longer baking time at a slightly lower temperature can achieve better results.
Can I make these ahead of time?
While Crispy Baked Zucchini Chips are best enjoyed fresh out of the oven for maximum crispness, they can be made a few hours in advance. Store them in an airtight container at room temperature once they’ve completely cooled. They will lose some of their crunch over time, but they’ll still be a delightful snack. For the absolute best texture, I recommend making them as close to serving time as possible.
Crispy Baked Zucchini Chips
Deliciously crispy baked zucchini chips, a healthier alternative to fried snacks.
Ingredients
Instructions
Important Information
Nutrition Facts (Per Serving)
It is important to consider this information as approximate and not to use it as definitive health advice.
Allergy Information
Please check ingredients for potential allergens and consult a health professional if in doubt.