Homemade Fruit Leather – Easy & Delicious Recipe
Homemade fruit leather recipes are a fantastic way to capture the essence of summer and preserve delicious, seasonal flavors. I absolutely adore making fruit leather because it’s not just a snack; it’s a nostalgic trip back to childhood, a burst of pure, unadulterated fruit goodness in every chewy bite. Forget those store-bought versions loaded with artificial colors and preservatives – this homemade fruit leather recipe allows you to control exactly what goes in, making it a healthier and more satisfying treat for everyone. The magic of fruit leather lies in its simplicity: just fruit, a touch of sweetness if you desire, and a little patience. What truly makes it special is the incredible versatility. You can blend your favorite fruits, experiment with unique flavor combinations, and enjoy a vibrant, healthy snack that’s as beautiful as it is delicious. Let’s get started on creating your own incredible fruit leather!
Homemade Fruit Leather Recipe
There’s something incredibly satisfying about making your own fruit leather. It’s a fantastic way to preserve seasonal fruit, reduce food waste, and create a delicious, healthy snack that’s miles better than anything you’ll find in a store. Plus, it’s surprisingly easy! Imagin extracte the vibrant taste of sun-ripened berries or sweet peaches transformed into chewy, tangy strips of pure fruity goodness. This recipe is a fantastic starting point, and once you’ve mastered it, you can experiment with all sorts of fruit combinations. The natural sweetness of the fruit shines through, with just a touch of sugar and lemon juice to enhance its flavor and help with preservation. It’s perfect for lunchboxes, hiking trips, or just a guilt-free treat anytime.
Ingredients:
Instructions:
Prepare Your Fruit
The first step is to get your fruit ready. You can use almost any fruit you like for fruit leather! Berries like strawberries, raspberries, blueberries, and blackberries work beautifully. Stone fruits like peaches, plums, and apricots are also excellent choices. Apples and pears can be used, but they often benefit from being cooked down a bit more to soften. For this recipe, we’re using 2 cups of chopped fruit. If you’re using larger fruits like peaches or apples, make sure to remove the pits and cores, and then chop them into roughly uniform pieces. This will help them cook down evenly. If you’re using berries, you can leave them whole or halve them if they are particularly large. The goal is to have bite-sized pieces that will blend smoothly later.
Cook and Soften the Fruit
Once your fruit is chopped, it’s time to cook it down. Place your chopped fruit in a saucepan over medium heat. You want to cook the fruit until it begin extracts to soften and release its juices. This usually takes about 5-10 minutes, depending on the type of fruit. Stir occasionally to prevent sticking. If your fruit is particularly dry or firm, you can add a tablespoon or two of water to help it start steaming and softening, but most fruits will release enough liquid on their own. The goal here is to break down the fruit’s structure so it can be easily pureed into a smooth consistency. Don’t worry if it looks a bit watery at this stage; that’s perfectly normal.
Sweeten and Flavor
Once the fruit has softened, it’s time to add the sugar and lemon juice. Add the 3 tablespoons of white sugar and the juice of ½ a lemon to the saucepan with the cooked fruit. Stir everything together well. The sugar will help to sweeten the fruit leather and also acts as a slight preservative. The lemon juice adds a touch of acidity, which brightens the fruit’s natural flavor and helps to prevent browning, especially if you’re using fruits like apples or peaches. Continue to cook for another 2-3 minutes, stirring constantly, until the sugar has dissolved completely. The mixture should be starting to look more like a thick sauce.
Puree the Fruit Mixture
Now for the fun part – creating that smooth, spreadable base! Carefully transfer the hot fruit mixture into a blender or food processor. If you’re using an immersion blender, you can blend it directly in the saucepan, being careful to avoid splattering. Blend the mixture until it is completely smooth and no chunks of fruit remain. You want a consistency similar to applesauce or a thick smoothie. If the mixture is too thick to blend easily, you can add a teaspoon or two of water at a time until you reach your desired smoothness. Taste the puree at this point and adjust the sugar or lemon juice if you feel it needs it, though it’s best to err on the side of less sugar as the fruit will concentrate in flavor as it dries.
Dehydrate the Fruit Leather
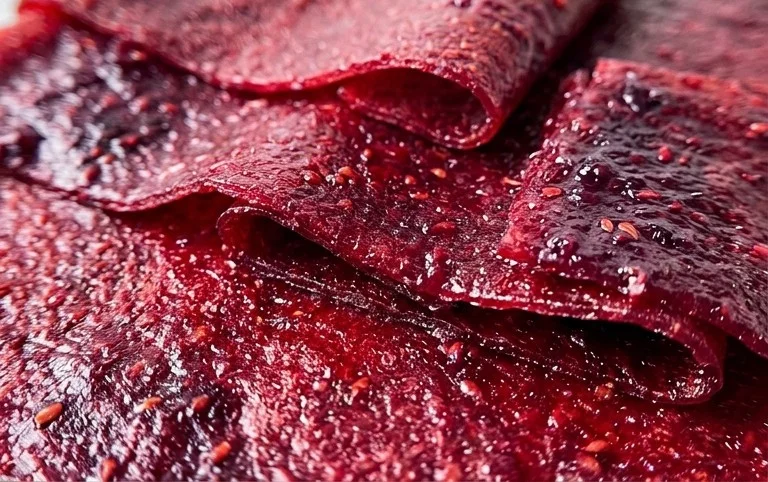
This is where the magic happens! Preheat your oven to its lowest setting, typically between 170°F and 200°F (75°C to 95°C). Line a baking sheet with parchment paper or a silicone baking mat, making sure the edges are well-covered. Pour the fruit puree onto the prepared baking sheet. Use a spatula to spread it into a thin, even layer, about ¼ inch thick. Aim for an even thickness so that the fruit leather dries uniformly. Thicker spots will take longer to dry and can become leathery rather than chewy. Carefully place the baking sheet into the preheated oven. Leave the oven door slightly ajar (you can prop it open with a wooden spoon) to allow moisture to escape. This is crucial for proper drying. The drying time can vary significantly, from 4 to 12 hours, depending on your oven’s temperature, the thickness of your fruit layer, and the humidity in your kitchen. Check the fruit leather periodically. It’s ready when it is no longer sticky to the touch and peels cleanly away from the parchment paper. It should be pliable but not wet.
Cool, Cut, and Store
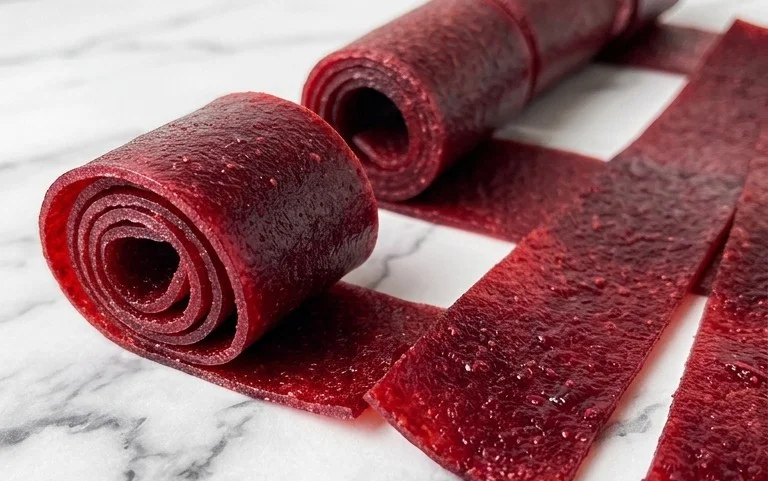
Once your fruit leather is fully dried, carefully remove the baking sheet from the oven. Let the fruit leather cool completely on the baking sheet. As it cools, it will firm up even more. Once cool, you can peel the fruit leather off the parchment paper. If you spread it thinly and evenly, it should peel away easily. You can then cut it into strips using a pizza cutter or a sharp knife. For easy storage, you can roll up the strips. Store your homemade fruit leather in an airtight container at room temperature. Properly stored, it can last for several weeks. Enjoy your delicious, homemade creation!
Conclusion:
Making your own homemade fruit leather is such a rewarding and delicious endeavor! Not only is this recipe wonderfully simple, requiring minimal ingredients and hands-on time, but it also allows you to control exactly what goes into your snacks. You can create healthy, vibrant treats packed with the natural sweetness and goodness of your favorite fruits, free from artificial colors and preservatives. It’s the perfect way to preserve seasonal bounty and create a delightful, chewy snack that both kids and adults will adore. I truly encourage you to give this homemade fruit leather recipe a try – you might be surprised at how easy and satisfying it is!
Enjoy your fruit leather straight from the roll for a quick energy boost, or get creative with serving suggestions! It’s fantastic sliced into strips for lunchboxes, cut into fun shapes with cookie cutters for parties, or even crum extractbled over yogurt or ice cream for a burst of fruity flavor. Don’t be afraid to experiment with different fruit combinations; pears and gin extractger, mango and lime, or even a blend of berries all make for delicious variations. The possibilities are truly endless!
Frequently Asked Questions:
What fruits work best for homemade fruit leather?
Almost any fruit can be used! Berries, stone fruits like peaches and plums, apples, pears, mangoes, and even kiwis are excellent choices. For the best flavor and texture, I recommend using ripe, in-season fruits. Blending a sweeter fruit with a slightly tarter one can create a more complex and interesting flavor profile.
How long does homemade fruit leather last?
When stored properly in an airtight container at room temperature, your homemade fruit leather should last for about 2-3 weeks. For longer storage, you can refrigerate it, which can extend its shelf life to several months. Make sure it’s completely cooled before sealing it away to prevent condensation.
My fruit leather is too sticky. What went wrong?
The most common reason for sticky fruit leather is not drying it sufficiently. Ensure your oven is set to a low temperature and allow ample drying time. If it’s still too sticky after drying, you can try placing it back in the oven for another hour or two at a very low temperature. You can also dust it lightly with cornstarch or powdered sugar before rolling, though this is more for handling than for the actual drying process.
Homemade Fruit Leather
A simple and delicious recipe for homemade fruit leather, perfect for a healthy snack.
Ingredients
-
2 cups fruit, chopped
-
3 tbsp white sugar
-
juice of 1/2 lemon
-
1/4 cup water
-
1/4 tsp cinnamon
-
Pinch of salt
Instructions
-
Step 1
Combine chopped fruit, sugar, lemon juice, water, cinnamon, and salt in a saucepan. -
Step 2
Cook over medium heat, stirring occasionally, until the fruit is softened and the mixture has thickened, about 10-15 minutes. -
Step 3
Puree the fruit mixture until smooth using an immersion blender or a regular blender. -
Step 4
Pour the puree onto a baking sheet lined with parchment paper or a silicone baking mat, spreading it thinly and evenly. -
Step 5
Bake in a preheated oven at 170°F (77°C) for 3-4 hours, or until the fruit leather is no longer sticky to the touch and peels easily from the parchment paper. -
Step 6
Let cool completely, then cut into strips or desired shapes.
Important Information
Nutrition Facts (Per Serving)
It is important to consider this information as approximate and not to use it as definitive health advice.
Allergy Information
Please check ingredients for potential allergens and consult a health professional if in doubt.