Nut-Free Pesto Recipe – Delicious & Easy
Nut Free Pesto is a revelation for anyone who’s ever dreamed of that vibrant, herbaceous goodness but had to shy away due to allergies or simply wanting to share the joy with more people. We all know and love traditional pesto for its incredible versatility – slathered on pasta, dolloped onto chicken, spread on crusty bread, or stirred into soup. It’s that burst of fresh basil, the satisfying richness, and the hint of garlic that makes it so irresistible. But what if you could have all of that without the pine nuts? That’s where this incredible Nut Free Pesto recipe comes in. It’s not just a substitute; it’s a delicious, crowd-pleasing alternative that brings its own unique charm to your table. Get ready to discover a new favorite way to enjoy this classic Italian sauce.
Why You’ll Adore This Nut Free Pesto
It’s surprisingly easy to make!
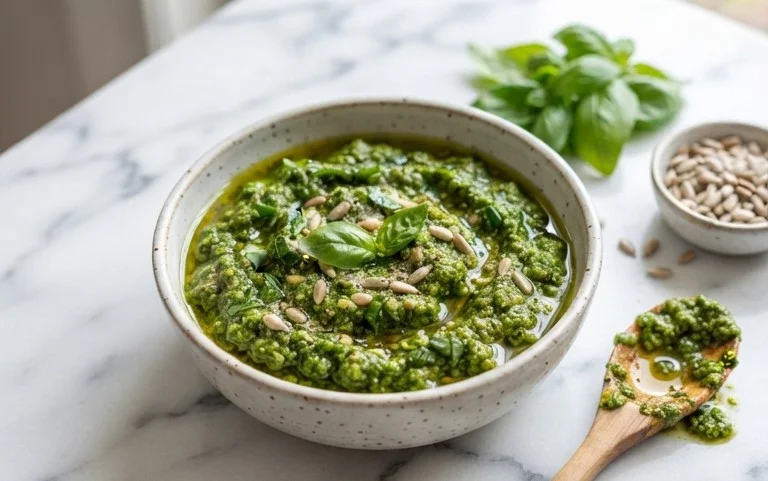
Nut-Free Pesto: A Delicious Allergy-Friendly Classic
For many, pesto conjures up images of vibrant green sauce, bursting with the flavor of basil and pine nuts. However, for those with nut allergies or cooking for individuals with such restrictions, this beloved condiment can be off-limits. But fear not! Creating a sensational, nut-free pesto is surprisingly simple and just as delicious as its traditional counterpart. My recipe swaps out the pine nuts for a surprisingly satisfying alternative, allowing everyone to enjoy this versatile sauce. This nut-free pesto is perfect tossed with pasta, spread on sandwiches, dolloped onto grilled chicken or fish, or even used as a dip. It’s a pantry staple in my kitchen, and I’m excited to share it with you.
Ingredients:
Making Your Nut-Free Pesto
This recipe is all about minimal effort for maximum flavor. The key is to use fresh, high-quality ingredients. When selecting your basil, look for bright green, unblemished leaves. The aroma should be fresh and peppery. Garlic cloves that are firm and free of any soft spots or mold will yield the best flavor. Freshly grated Parmesan cheese makes a noticeable difference compared to pre-shredded varieties, as it melts more smoothly and has a richer taste.
Step-by-Step Instructions
1. Begin extract by preparing your basil. Gently wash the basil leaves under cool running water and then pat them thoroughly dry with paper towels or a clean kitchen towel. It’s crucial that the basil is completely dry before adding it to the food processor. Excess moisture can lead to a watery pesto and can affect its shelf life. You can also spin your basil in a salad spinner if you have one; this is a very efficient way to remove all the moisture. Once dry, roughly chop the basil leaves. This isn’t strictly necessary for a food processor, but it can help break down the larger leaves more easily in the initial stages of blending.
2. Next, it’s time to introduce the garlic. Peel your two garlic cloves. You can easily peel garlic by placing the flat side of your knife on a clove and giving it a gentle whack. The skin should then slip off with ease. If you’re not a fan of very strong raw garlic flavor, you can lightly roast the garlic cloves before adding them. To do this, wrap them in foil with a tiny drizzle of olive oil and bake at 375°F (190°C) for about 10-15 minutes until softened. Let them cool slightly before adding to the food processor. Add the peeled garlic cloves to your food processor.
3. Now, add the freshly grated Parmesan cheese to the food processor with the basil and garlic. Using freshly grated cheese is a game-changer for pesto. It avoids the anti-caking agents found in pre-shredded cheese, resulting in a smoother, more integrated sauce. Ensure your Parmesan is finely grated for the best texture. If you don’t have Parmesan, a good quality Pecorino Romano can also be used, though it will impart a slightly sharper, saltier flavor.
4. Pulse the ingredients in the food processor until they are coarsely chopped. Don’t over-process at this stage. We want to break down the ingredients, but not turn them into a paste just yet. Scrape down the sides of the food processor bowl with a spatula to ensure all the ingredients are incorporated. This initial pulsing helps to create a good base for the pesto.
5. With the food processor running on low speed, slowly drizzle in the olive oil. This is the most important step for achieving the creamy, emulsified texture of pesto. Pour the olive oil in a thin, steady stream. You’ll notice the mixture starting to thicken and turn into a vibrant green sauce. Continue processing until the pesto reaches your desired consistency. Some people prefer a chunkier pesto, while others like it smoother. Taste and adjust seasoning as needed. Add the salt and pepper now. If it’s too thick for your liking, you can add a tiny bit more olive oil, a teaspoon at a time, until you reach your preferred consistency. Be careful not to add too much liquid at once.
Tips for Serving and Storage
Once your nut-free pesto is ready, you can use it immediately or store it. For immediate use, toss it with your favorite cooked pasta. A squeeze of fresh lemon juice can brighten the flavors even further if you like. To store, transfer the pesto to an airtight container. Pour a thin layer of olive oil over the top before sealing. This acts as a barrier to prevent oxidation and keeps the pesto fresh. Refrigerated, it should last for about 5-7 days. For longer storage, you can freeze pesto in ice cube trays. Once frozen, transfer the cubes to a freezer-safe bag. This is a fantastic way to have single-serving portions ready to go. Thaw frozen pesto in the refrigerator or gently warm it on the stovetop. Enjoy this delicious, allergy-friendly version of a classic!
Conclusion:
I hope you’ve enjoyed learning how to make this delicious nut free pesto! It truly is a fantastic recipe because it caters to those with nut allergies, opening up the wonderful world of pesto to more people. The vibrant green hue and fresh, herbaceous flavor are perfect for elevating so many dishes. This versatile sauce is incredibly satisfying to whip up yourself, knowing exactly what goes into it.
You can serve this nut free pesto in so many ways! It’s perfect tossed with your favorite pasta, spread on sandwiches or wraps, used as a dip for fresh vegetables, dolloped onto grilled chicken or fish, or even swirled into soups. Don’t be afraid to experiment with variations either! You can swap out the basil for spinach or arugula for a different flavor profile, or add a pinch of red pepper flakes for a bit of heat.
I really encourage you to give this recipe a try. It’s surprisingly easy, incredibly rewarding, and tastes absolutely wonderful. Let me know how it turns out for you!
Frequently Asked Questions:
Can I make this nut free pesto ahead of time?
Yes, absolutely! This nut free pesto can be made up to 3-4 days in advance. Store it in an airtight container in the refrigerator. To prevent browning, you can pour a thin layer of olive oil over the surface before sealing the container. This helps to create a barrier against air.
What kind of seeds can I use instead of pine nuts?
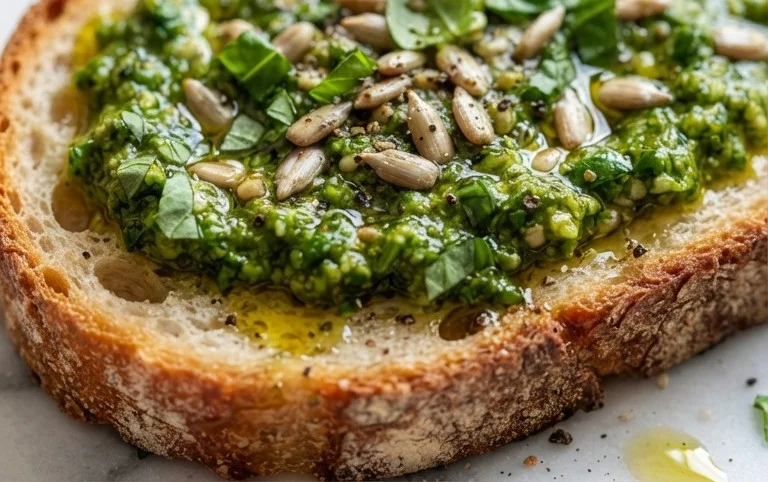
Sunflower seeds are a fantastic and readily available substitute for pine nuts in this nut free pesto. They offer a similar subtle nuttiness and creamy texture. Pumpkin seeds (pepitas) are another excellent option, providing a slightly earthier flavor. Just make sure to toast them lightly for the best taste!
My pesto seems a little too thick. How can I thin it out?
If your nut free pesto is thicker than you’d like, you can easily thin it out by adding a little more extra virgin extract olive oil, a tablespoon at a time, while processing or stirring. You can also add a splash of water or a squeeze of lemon juice, which can also help to brighten the flavors.
Nut-Free Pesto
A delicious and easy nut-free pesto sauce, perfect for pasta, sandwiches, or as a dip.
Ingredients
-
2 cups fresh basil
-
2 garlic cloves
-
1/2 cup freshly grated Parmesan cheese
-
1/4 cup olive oil
-
1/4 teaspoon salt
-
1/8 teaspoon pepper
Instructions
-
Step 1
Combine basil, garlic cloves, Parmesan cheese, salt, and pepper in a food processor. -
Step 2
Pulse until coarsely chopped. -
Step 3
With the food processor running, slowly drizzle in the olive oil until the pesto is smooth and well combined. -
Step 4
Taste and adjust seasoning if necessary. -
Step 5
Transfer pesto to a bowl or airtight container. -
Step 6
Store in the refrigerator for up to a week, or freeze for longer storage.
Important Information
Nutrition Facts (Per Serving)
It is important to consider this information as approximate and not to use it as definitive health advice.
Allergy Information
Please check ingredients for potential allergens and consult a health professional if in doubt.