Homemade Caesar Salad Dressing-Easy & Delicious
Homemade Caesar Salad Dressing is a culinary revelation that transforms a simple salad into an unforgettable experience. Forget those store-bought bottles that often fall short of the mark; we’re about to unlock the secret to creating a creamy, tangy, and utterly irresistible Caesar dressing right in your own kitchen. So, why does this dressing hold such a special place in our hearts (and on our plates)? It’s the perfect balance of bold flavors – the salty anchovy, the sharp bite of Parmesan, the zesty punch of lemon, and that signature garlicky whisper. This homemade Caesar Salad Dressing is more than just a condiment; it’s a flavor explosion, a testament to the magic that happens when fresh, quality ingredients come together. Get ready to elevate your salads to a whole new level of deliciousness.
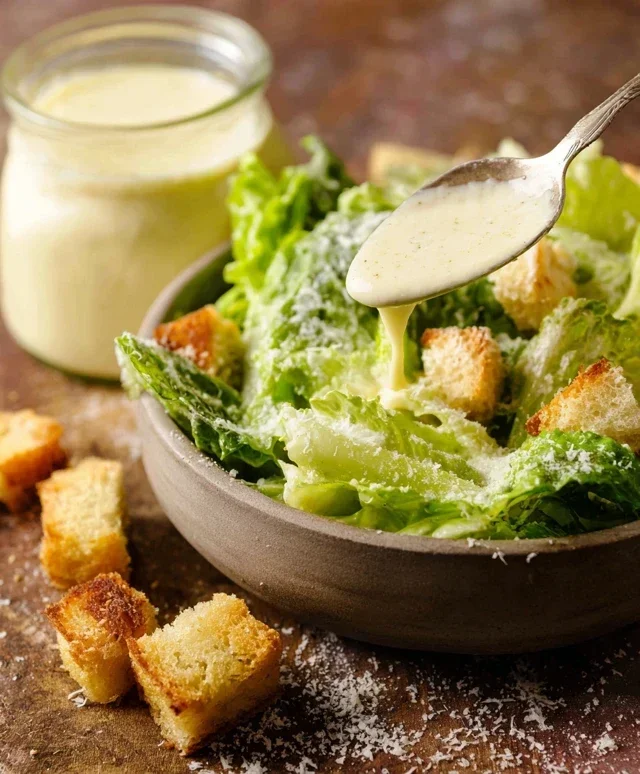
Homemade Caesar Salad Dressing
Forget the bottled stuff! Making Caesar salad dressing from scratch is surprisingly simple and incredibly rewarding. The vibrant, tangy, and umami-rich flavor you achieve at home is leagues beyond anything you’ll find pre-made. This recipe delivers a classic Caesar dressing that’s perfect for tossing with crisp romaine lettuce, crunchy croutons, and plenty of Parmesan cheese. It’s also wonderfully versatile – try it as a dip for veggies or a marinade for chicken! Let’s get started on creating this culinary masterpiece in your own kitchen.
Ingredients:
Instructions:
The beauty of homemade Caesar dressing lies in its simplicity and the ability to control every flavor component. We’ll build this dressing layer by delicious layer, ensuring a balanced and irresistible result.
Phase 1: Building the Flavor Base
In a medium-sized bowl, we begin extract by combining the foundational elements that will give our dressing its signature tang and depth. Add the two large egg yolks to the bowl. It’s important that these are at room temperature; this helps them emulsify better with the oil later on, resulting in a smoother, creamier dressing. Next, squeeze in the fresh lemon juice. Fresh lemon juice is non-negotiable here – its bright, zesty flavor is crucial. Then, add the Dijon mustard. Dijon adds a subtle sharpness and also acts as an emulsifier, helping to bind the ingredients together. For that unmistakable Caesar punch, add the minced garlic. If you’re not a fan of raw garlic’s intensity or are short on time, you can substitute 1 teaspoon of garlic powder, but fresh is always best if you can manage it. Finally, incorporate the Worcestershire sauce and the anchovy paste. Worcestershire sauce provides a complex layer of savory notes, and anchovy paste (or finely minced anchovy fillets) is the secret weapon for that authentic umami richness that defines Caesar dressing. Don’t be scared of the anchovies; they dissolve into the dressing and contribute a deep, savory flavor without tasting fishy. Stir all these ingredients together until they are well combined.
Now, we introduce the salty, nutty heart of our dressing: the Parmesan cheese. Add the 1/4 cup of grated Parmesan cheese to the bowl with the other ingredients. Use good quality Parmesan for the best flavor. Stir everything together again until the cheese is evenly distributed throughout the mixture. At this stage, you’ll have a thick, aromatic paste. This is our base, ready to be transformed into a luscious dressing.
Phase 2: Emulsification – The Magic Happens
This is where the magic truly happens, transforming our concentrated flavor base into a silky smooth dressing. We’re going to slowly drizzle in the extra virgin extract extract olive oil. It is critical to add the oil very slowly at first, a few drops at a time, while whisking continuously. Think of it like building a foundation – you want to start gently. Use a whisk and vigorous, circular motions. As you add the oil, you’ll notice the mixture starting to thicken and change consistency. This process is called emulsification, where the oil and the other liquid ingredients are bound together. Be patient; rushing this step can lead to an oily dressing that separates. Once you see the mixture starting to emulsify and thicken nicely, you can start to drizzle the oil in a slightly steadier, but still thin, stream, continuing to whisk constantly. The goal is a creamy, smooth, and stable dressing.
As you continue to whisk and incorporate the olive oil, keep an eye on the consistency. You’re looking for a dressing that is thick enough to coat the back of a spoon beautifully, but still pourable. If it becomes too thick for your liking, you can add a teaspoon or two of water or more lemon juice to thin it out to your desired consistency. Don’t be afraid to adjust it! The extra virgin extract extract olive oil will contribute a lovely fruity note and a smooth texture, so feel free to use a good quality one. Remember, the quality of your ingredients will directly impact the final taste of your dressing.
Phase 3: Seasoning and Finishing Touches
Once all the olive oil has been incorporated and your dressing has reached a beautiful creamy consistency, it’s time to season it to perfection. Taste the dressing carefully. Add salt and freshly ground black pepper as needed. The anchovy paste and Parmesan cheese already contribute saltiness, so start with just a pinch of salt and add more if necessary. Freshly ground black pepper is essential for that classic Caesar bite. Continue to whisk after each addition until the seasoning is just right for your palate. You want a balanced flavor profile – tangy from the lemon, savory from the anchovy and Worcestershire, sharp from the garlic and Dijon, and rich from the egg yolks and Parmesan. Don’t be afraid to adjust the lemon juice or add a touch more garlic if you feel it needs it. This is your chance to customize it to your exact preferences. Once seasoned, give it one final, thorough whisk to ensure everything is perfectly combined. Your homemade Caesar salad dressing is now ready to be enjoyed! Transfer it to an airtight container and store it in the refrigerator. It will continue to thicken slightly as it chills.
This homemade Caesar salad dressing is best used within a few days for optimal freshness. Enjoy it on your favorite salad or get creative with its many other uses!
Conclusion:
I hope you’re as excited as I am to ditch the store-bought stuff and whip up your own incredible Homemade Caesar Salad Dressing! This recipe is fantastic because it allows you to control the ingredients, ensuring a fresh, vibrant, and perfectly balanced flavor that store-bought versions often can’t match. The creamy emulsion, the zing of lemon, the savory depth of Parmesan, and that hint of garlic create a truly irresistible dressing. It’s surprisingly simple to make, and the results are so rewarding.
This dressing isn’t just for classic Caesar salads, though that’s a magnificent starting point! Drizzle it over grilled chicken or fish, use it as a dip for crunchy vegetables, or even toss it with roasted potatoes. The possibilities are truly endless. Don’t be afraid to experiment with variations! Add a touch of Dijon mustard for extra tang, a pinch of anchovy paste for an intensified umami flavor (if you’re feeling adventurous!), or even a dash of hot sauce for a little kick.
I truly encourage you to give this Homemade Caesar Salad Dressing recipe a try. You’ll be amazed at how easy it is and how much better it tastes. Happy dressing making!
Frequently Asked Questions:
Can I make this dressing ahead of time?
Absolutely! This dressing can be made a day or two in advance and stored in an airtight container in the refrigerator. The flavors will actually meld and deepen even further. Just give it a good whisk before serving, as it may separate slightly.
What if I don’t have anchovy paste?
While anchovy paste is traditional and adds a wonderful depth of flavor, you can still make a delicious Caesar dressing without it. The other ingredients like Parmesan and garlic will still provide plenty of savory notes. Some people also find that a small amount of Worcestershire sauce can offer a similar umami element.
How long does this dressing last in the refrigerator?
When stored properly in an airtight container in the refrigerator, this homemade Caesar salad dressing should stay fresh for about 3 to 4 days. Always use clean utensils when serving to maintain its freshness.
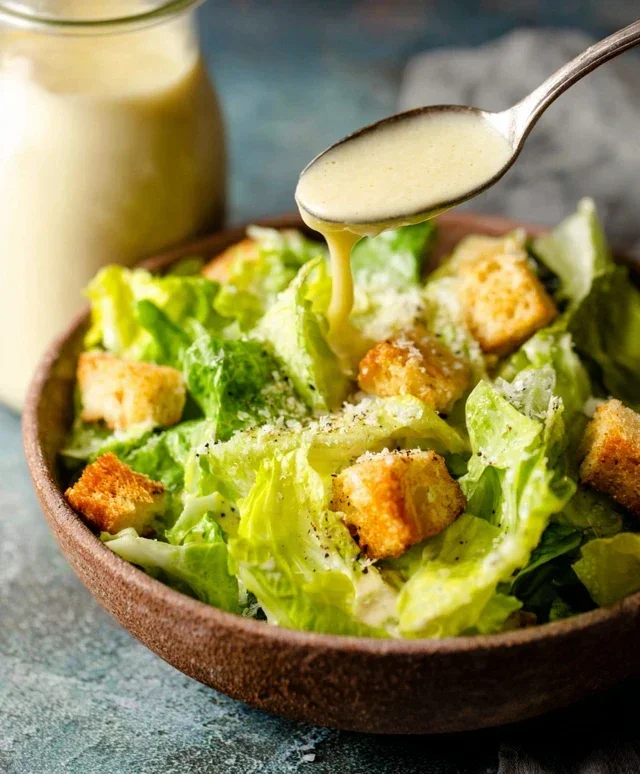
Homemade Caesar Salad Dressing
A classic and creamy homemade Caesar salad dressing, perfect for any salad. Made with simple, fresh ingredients.
Ingredients
-
2 large egg yolks
-
4 cloves garlic, minced
-
2 tablespoons fresh lemon juice
-
1 teaspoon Dijon mustard
-
1/2 cup grated Parmesan cheese
-
1/2 cup extra virgin olive oil
-
1 teaspoon Worcestershire sauce
Instructions
-
Step 1
In a medium bowl, whisk together the egg yolks, minced garlic, fresh lemon juice, and Dijon mustard until well combined. -
Step 2
Gradually drizzle in the extra virgin olive oil while continuously whisking. Continue whisking until the dressing is thick and emulsified. -
Step 3
Stir in the grated Parmesan cheese and Worcestershire sauce. -
Step 4
Season with salt and freshly ground black pepper to taste. -
Step 5
For a thinner dressing, add a tablespoon of water and whisk until desired consistency is reached. -
Step 6
Serve immediately or store in an airtight container in the refrigerator for up to 3 days.
Important Information
Nutrition Facts (Per Serving)
It is important to consider this information as approximate and not to use it as definitive health advice.
Allergy Information
Please check ingredients for potential allergens and consult a health professional if in doubt.