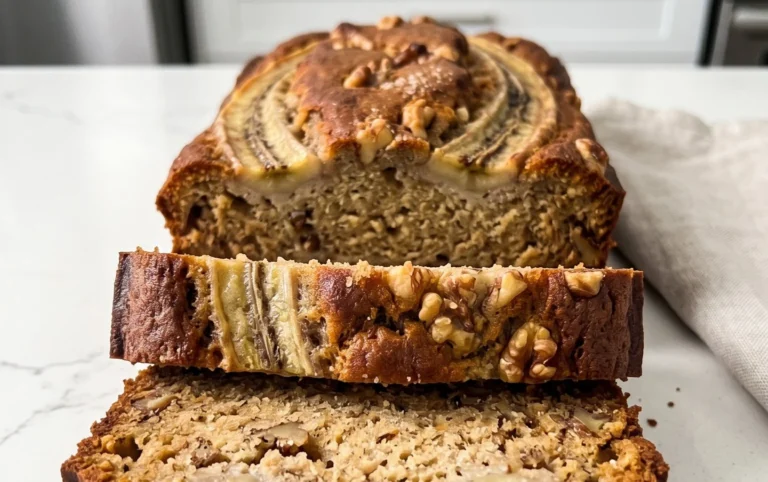
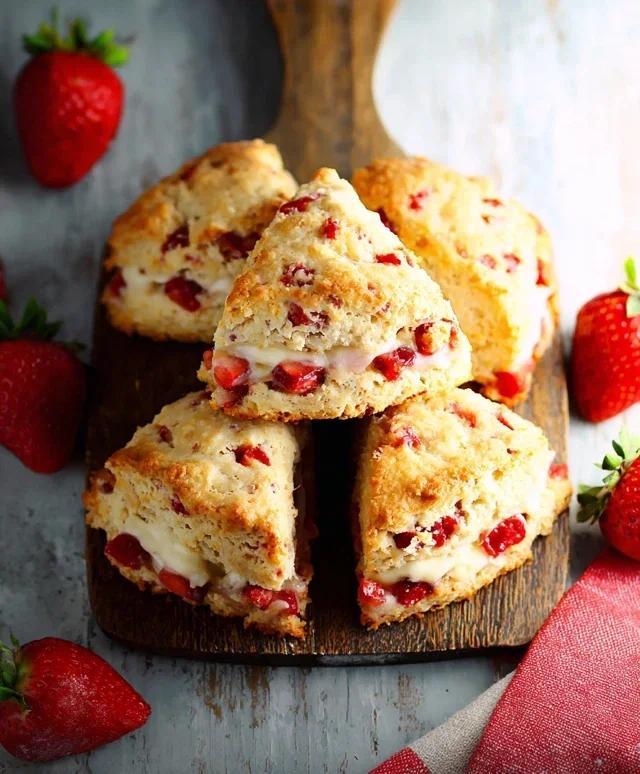
Fluffy Strawberry Scones- Easy & Delicious Recipe
Strawberry Scones are more than just a breakfast treat; they’re a little piece of sunshine baked into a delightful bite. There’s something undeniably magical about their crum extractbly texture, the burst of sweet-tart strawberries, and that subtle hint of buttery goodness. I’ve always been a sucker for a good scone, but these strawberry scones hold a special place in my heart. They remind me of lazy weekend mornings, the smell of baking filling the house, and the simple joy of sharing something homemade with loved ones. What makes these particular strawberry scones so special? It’s the perfect balance of flavors and textures, achieved through a few key techniques that ensure a tender interior and a beautifully golden, slightly crisp exterior. Get ready to elevate your baking game with a recipe that’s as rewarding to make as it is to devour.

Strawberry Scones
There’s something undeniably special about a freshly baked scone. Crisp on the outside, tender and slightly crum extractbly on the inside, they’re the perfect accompaniment to a morning coffee or an afternoon tea. And when you add the burst of sweet-tart flavor from fresh strawberries, you elevate a classic to something truly extraordinary. These Strawberry Scones are surprisingly simple to make, and the reward is immense. Imagin extracte that first bite – the buttery richness, the subtle sweetness, and the delightful tang of strawberries, all brought together with a light, airy texture. They’re perfect for a weekend brunch, a special occasion, or simply a treat for yourself. Let’s get baking!
Ingredients:
Making the Scone Dough
This is where the magic begin extracts. The key to tender scones is to keep everything cold and to handle the dough as little as possible. Overworking the dough will develop the gluten too much, resulting in tough scones.
1. In a medium bowl, whisk together the buttermilk and the slightly beaten egg until well combined. This will be our wet ingredient mixture.
2. In a large bowl, whisk together the all-purpose flour, granulated sugar, baking powder, and fine sea salt. Ensure all the dry ingredients are evenly distributed. This ensures that the leavening agents and salt are incorporated throughout the flour, leading to an even rise and flavor.
3. Add the cold, cubed unsalted butter to the dry ingredients. Using your fingertips, a pastry blender, or a food processor, cut the butter into the flour mixture until it resembles coarse crum extractbs with some pea-sized pieces of butter remaining. These larger pieces of butter will melt during baking, creating steam that helps to make the scones light and flaky. Work quickly so the butter doesn’t warm up too much. If you’re using your hands, try to rub the butter into the flour quickly and efficiently, avoiding over-handling.
4. Gently fold in the chopped strawberries. Make sure they are evenly distributed throughout the mixture, but try not to mash them, as this can color the dough pink and make it a bit sticky.
5. Pour the buttermilk and egg mixture into the dry ingredients. Using a fork or a spatula, gently stir until just combined. The dough will be shaggy and a bit sticky. Resist the urge to add more flour at this stage. This minimal mixing is crucial for tender scones.
Shaping and Baking the Scones
Now that we have our beautiful scone dough, it’s time to give it shape and bake it to golden perfection.
1. Turn the dough out onto a lightly floured surface. You’ll want to use that extra 1/4 cup of all-purpose flour here to prevent sticking. Gently bring the dough together with your hands, patting it into a disc about 3/4 to 1 inch thick. Again, avoid overworking the dough. If it feels too sticky, dust your hands and the surface very lightly with flour.
2. You can cut the disc into wedges, like a pie, using a sharp knife or a bench scraper. For about 6-8 scones, cut the disc into 8 equal wedges. Alternatively, you can use a round biscuit cutter to create individual scones. If you’re using a cutter, dip it in flour between each cut to prevent sticking. For a slightly rustic look, the wedge method is perfect.
3. Carefully transfer the scones to a baking sheet lined with parchment paper. Leave a little space between each scone to allow for even baking. For an extra touch of beauty and a lovely golden crust, you can brush the tops of the scones with a little extra buttermilk or a beaten egg. You can also sprinkle them with a touch more granulated sugar for a subtle crunch.
4. Bake in a preheated oven at 400°F (200°C) for 15-20 minutes, or until the scones are golden brown and a toothpick inserted into the center comes out clean. The exact baking time will depend on your oven and the thickness of your scones. Keep an eye on them towards the end of the baking time.
The Lemon Glaze
No scone is truly complete without a delightful glaze. This simple lemon glaze adds a touch of brightness and sweetness that perfectly complements the strawberries.
1. While the scones are baking, prepare the glaze. In a small bowl, whisk together the powdered sugar and the fresh-squeezed lemon juice until smooth and pourable. If the glaze is too thick, add a tiny bit more lemon juice (or milk if you prefer a less tangy flavor) until it reaches your desired consistency. If it’s too thin, add a bit more powdered sugar. The consistency should be thick enough to coat the scones but still thin enough to drizzle.
2. Once the scones are baked and have cooled slightly on the baking sheet (about 5-10 minutes), remove them from the oven. Transfer them to a wire rack to cool completely.
3. Once the scones have cooled, drizzle the lemon glaze generously over the tops. Let the glaze set for a few minutes before serving.
Enjoy your warm, homemade Strawberry Scones! They are best enjoyed fresh, but any leftovers can be stored in an airtight container at room temperature for a day or two.
Conclusion:
There you have it! A straightforward yet utterly delicious recipe for fresh Strawberry Scones that I’m confident you’ll adore. The beauty of these scones lies in their simplicity and the burst of vibrant, sweet strawberry flavor that sings in every bite. They’re perfectly tender, lightly crum extractbly, and impossibly satisfying, making them an ideal treat for any occasion. Whether you’re looking for a delightful breakfast addition, a charming afternoon tea accompaniment, or a sweet finish to a meal, these strawberry scones deliver. I highly encourage you to give this recipe a try – you might just find your new favorite scone!
Serving Suggestions: These scones are wonderful served warm with a dollop of clotted cream or whipped cream and a drizzle of honey. They also pair beautifully with your morning coffee or a cup of herbal tea. For an extra touch of indulgence, consider a light dusting of powdered sugar or a simple lemon glaze.
Variations: Feel free to experiment with other berries like blueberries or raspberries. You can also add a touch of lemon zest to the dough for an extra zesty kick, or swap out some of the strawberries for white chocolate chips for a delightful sweet and tart combination.
Frequently Asked Questions:
How can I make my scones extra fluffy?
The key to fluffy scones is to not overwork the dough. Mix the ingredients until just combined, and be gentle when shaping them. Overmixing develops the gluten, leading to tougher scones. Also, ensure your baking powder is fresh for optimal lift.
Can I use frozen strawberries?
Yes, you can use frozen strawberries! Make sure to thaw them completely and drain off any excess liquid before adding them to the dough to prevent a soggy texture.
How should I store leftover strawberry scones?
Store leftover scones in an airtight container at room temperature for up to 2 days. For longer storage, you can freeze them. Wrap them individually in plastic wrap, then place them in a freezer-safe bag. Reheat them gently in the oven or a toaster oven to refresh their texture.
Strawberry Scones
Delightful and tender strawberry scones, perfect for breakfast or a tea-time treat.
Ingredients
-
1/3 cup buttermilk
-
1 large egg
-
2 cups all-purpose flour
-
3 tablespoons granulated sugar
-
2 teaspoons baking powder
-
3/4 teaspoon fine sea salt
-
6 tablespoons cold unsalted butter
-
1/2 cup chopped strawberries
-
1 1/4 cup powdered sugar
-
2 tablespoons fresh-squeezed lemon juice
Instructions
-
Step 1
Preheat oven to 400°F (200°C) and line a baking sheet with parchment paper. -
Step 2
In a large bowl, whisk together the flour, granulated sugar, baking powder, and salt. -
Step 3
Cut in the cold butter using a pastry blender or your fingertips until the mixture resembles coarse crumbs. -
Step 4
Gently stir in the chopped strawberries. In a separate small bowl, whisk together the buttermilk and beaten egg. -
Step 5
Add the wet ingredients to the dry ingredients and mix until just combined. Do not overmix. -
Step 6
Turn the dough out onto a lightly floured surface and gently pat it into a 3/4-inch thick round. Cut into 8 wedges. -
Step 7
Place the scones on the prepared baking sheet and bake for 12-15 minutes, or until golden brown. -
Step 8
While the scones are baking, whisk together the powdered sugar and lemon juice to create a glaze. Adjust consistency with more lemon juice or powdered sugar as needed. -
Step 9
Once the scones are baked and slightly cooled, drizzle with the glaze.
Important Information
Nutrition Facts (Per Serving)
It is important to consider this information as approximate and not to use it as definitive health advice.
Allergy Information
Please check ingredients for potential allergens and consult a health professional if in doubt.