Easy Strawberry Danish Recipe-Delicious Breakfast Treat
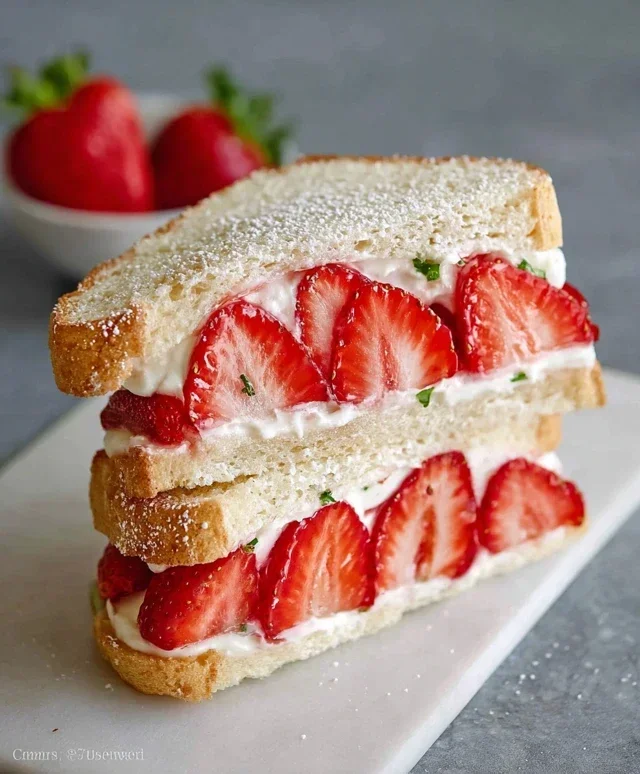
Strawberry Danish pastries are a delightful way to brighten any morning or afternoon. There’s something inherently special about these sweet, flaky treats, isn’t there? That perfect combination of buttery puff pastry, a creamy, luscious cream cheese filling, and the burst of sweet-tart fresh strawberries makes the Strawberry Danish a beloved classic. We adore them for their elegant presentation and their irresistible taste that transports us to a charming bakery with every bite. Whether you’re a seasoned baker or just starting out, creating your own homemade Strawberry Danish is incredibly rewarding. Get ready to impress yourself and anyone lucky enough to share these with you!
Why You’ll Love This Strawberry Danish Recipe:
Perfectly Flaky Pastry
Creamy, Dreamy Filling
Fresh, Vibrant Strawberries

Strawberry Danish Recipe
There’s something undeniably special about a freshly baked Danish. The flaky, buttery pastry, the sweet, creamy filling, and the burst of fresh fruit – it’s a treat that feels both elegant and comforting. And the best part? You can recreate this bakery favorite right in your own kitchen! This Strawberry Danish recipe uses readily available ingredients and a few simple techniques to deliver a truly delightful result. Get ready to impress yourself (and anyone lucky enough to share them with you!).
Ingredients:
Preparing the Strawberry Filling
This step is crucial for ensuring your Danish filling isn’t too watery. We want that perfect balance of fresh strawberry flavor and a pleasant, slightly thickened consistency. Start by gently tossing your sliced strawberries with the cornstarch and the single tablespoon of sugar. The cornstarch will act as a natural thickener as the strawberries release their juices. I like to let this mixture sit for about 10-15 minutes while I prepare the cream cheese filling. This gives the cornstarch a head start in absorbing some of the moisture.
Creating the Creamy Center
In a medium bowl, combine the softened cream cheese with the powdered sugar and the teaspoon of vanilla extract. For the best results, make sure your cream cheese is truly at room temperature. This will make it much easier to mix into a smooth, lump-free filling. Using an electric mixer on medium speed is ideal here. Beat the ingredients together until the mixture is light, fluffy, and completely smooth. You don’t want any grainy texture from the powdered sugar. This creamy layer is what provides that delightful contrast to the crisp pastry and bright fruit.
Assembling the Danish
Now for the fun part – assembling your beautiful Danishes! Begin extract by unfolding your thawed puff pastry sheets onto a lightly floured surface. You’ll want to cut each sheet into four equal squares. This will give you eight squares in total, perfect for individual Danishes. Next, take each square and lightly score a border about ½ inch from the edge. Be careful not to cut all the way through the pastry. This border will help create the signature raised edge that holds the filling. In the center of each square, spread a generous tablespoon of the cream cheese mixture. Don’t overfill, or it will ooze out during baking. Then, spoon about 1-2 tablespoons of your prepared strawberry mixture over the cream cheese. If you’re using the optional strawberry jam for an extra burst of flavor, you can add a small dollop on top of the strawberries now.
Baking to Golden Perfection
Preheat your oven to 400°F (200°C). Place your assembled Danishes on a baking sheet lined with parchment paper. This prevents sticking and makes for easier cleanup. Now, for that beautiful shine and golden hue, brush the edges of the puff pastry with the beaten egg wash. This egg wash will give your Danishes a lovely, professional-looking sheen. If you’re opting for the sugar topping, sprinkle a little bit of granulated sugar over the egg-washed edges. This adds a delightful sparkle and a subtle crunch. Bake for 18-22 minutes, or until the puff pastry is puffed up, golden brown, and looks beautifully flaky. Keep an eye on them as ovens can vary!
The Finishing Touches: Glazing and Serving
Once your Danishes are out of the oven and have cooled slightly on the baking sheet, it’s time for the glaze. In a small bowl, whisk together the 1 cup of powdered sugar, the ½ teaspoon of vanilla extract, and the milk. Start with 2 tablespoons of milk and add more, a teaspoon at a time, until you reach a smooth, drizzle-able consistency. You want it thick enough to coat but thin enough to drip elegantly. Drizzle this glaze over the tops of the cooled Danishes. If you used the optional strawberry jam earlier, the glaze will beautifully complement its color. Let the glaze set for a few minutes before serving. These Strawberry Danishes are best enjoyed fresh, while the pastry is still crisp. They are a perfect treat for breakfast, brunch, or an afternoon pick-me-up! Enjoy the fruits of your labor!
Conclusion:
I hope you’ve enjoyed exploring this delightful Strawberry Danish recipe! This recipe truly shines because of its perfect balance of flaky, buttery puff pastry, a luscious cream cheese filling, and the sweet burst of fresh strawberries. It’s an impressive treat that looks and tastes incredibly gourmet, yet it’s surprisingly achievable in your own kitchen. These beautiful pastries are perfect for a special brunch, a delightful afternoon tea, or even as a sweet ending to any meal. They pair wonderfully with a hot cup of coffee or a glass of chilled cbeef hampagne. Don’t hesitate to get creative with variations! Consider adding a touch of lemon zest to the cream cheese filling for an extra bright note, or topping with a sprinkle of slivered almonds for added crunch. You could even experiment with different berries like raspberries or blueberries. I wholeheartedly encourage you to give this Strawberry Danish recipe a try – I’m confident you’ll be delighted with the results and the joy it brings to your table!
Frequently Asked Questions about Strawberry Danishes:
Can I make the cream cheese filling ahead of time?
Absolutely! The cream cheese filling can be made up to 2 days in advance and stored in an airtight container in the refrigerator. Just give it a good stir before assembling your danishes.
What kind of puff pastry should I use?
For the best results, I recommend using all-butter puff pastry. It offers superior flavor and a more authentic flaky texture. Many grocery stores carry it in the frozen section.
How should I store leftover danishes?
Leftover danishes are best enjoyed the same day, but if you have any, store them in an airtight container at room temperature for up to a day. For longer storage, you can refrigerate them, but be aware the pastry might lose some of its crispness.
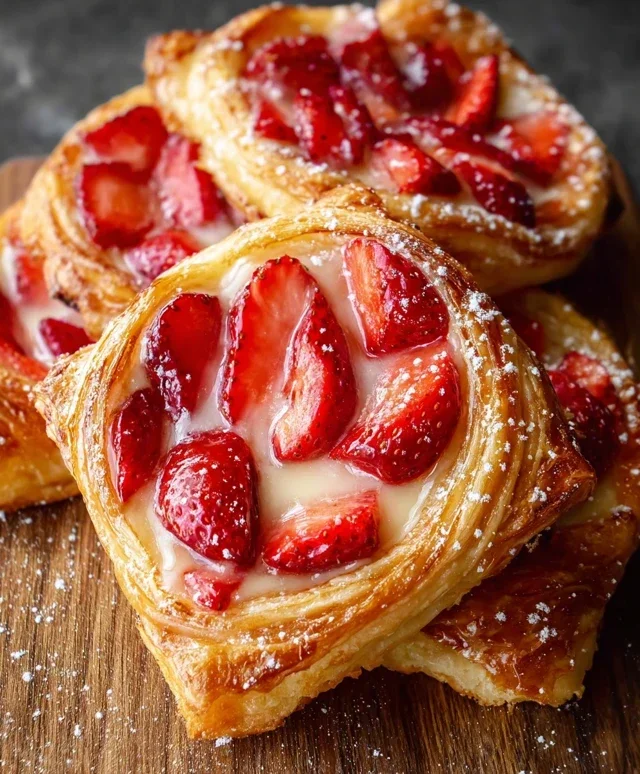
Strawberry Danish Recipe
Delicious and easy-to-make strawberry danishes with a creamy cheese filling and flaky puff pastry.
Ingredients
-
4 cups sliced strawberries
-
1 tablespoon cornstarch
-
1 tablespoon sugar
-
8 oz. (226 g) cream cheese, room temperature
-
½ cup (60 g) powdered sugar
-
1 teaspoon vanilla extract
-
2 puff pastry sheets, thawed
-
1 large egg ( lightly beaten with 1 teaspoon water)
-
2 – 3 tablespoons sugar for topping, optional
-
¼ cup (60 ml) strawberry jam, optional for topping
-
1 cup (120 g) powdered sugar
-
½ teaspoon vanilla extract
-
2 – 3 tablespoons (30 – 45 ml) milk
Instructions
-
Step 1
Preheat oven to 400°F (200°C). Line a baking sheet with parchment paper. -
Step 2
In a medium bowl, combine sliced strawberries, cornstarch, and 1 tablespoon sugar. Let sit for 10 minutes. -
Step 3
In a separate bowl, beat together cream cheese, ½ cup powdered sugar, and 1 teaspoon vanilla extract until smooth and creamy. -
Step 4
Unfold puff pastry sheets onto a lightly floured surface. Cut each sheet into 4 equal squares. Score a ½-inch border around the edge of each square, being careful not to cut all the way through. -
Step 5
Spoon about 1 tablespoon of the cream cheese mixture into the center of each pastry square. Top with a generous spoonful of the strawberry mixture. -
Step 6
Fold the corners of the pastry towards the center to create a danish shape, leaving the center filling exposed. Brush the edges of the pastry with the egg wash. -
Step 7
Sprinkle the tops with additional sugar, if desired. Bake for 18-20 minutes, or until golden brown and puffed. -
Step 8
While danishes are baking, whisk together 1 cup powdered sugar, ½ teaspoon vanilla extract, and milk until smooth for the glaze. Add more milk if needed to reach desired consistency. -
Step 9
Let danishes cool slightly on the baking sheet, then transfer to a wire rack. Drizzle with glaze and optional strawberry jam.
Important Information
Nutrition Facts (Per Serving)
It is important to consider this information as approximate and not to use it as definitive health advice.
Allergy Information
Please check ingredients for potential allergens and consult a health professional if in doubt.