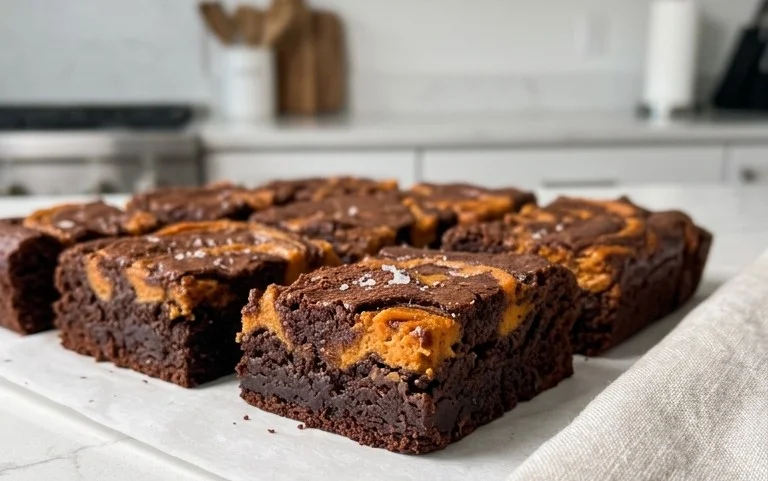
Decadent Dark Chocolate Cheesecake Brownies Recipe
Dark Chocolate Cheesecake Brownies are more than just a dessert; they’re an experience. Imagin extracte this: a deeply rich, fudgy brownie base, so intensely chocolatey it melts in your mouth, suddenly interrupted by swirls of creamy, tangy cheesecake. It’s a symphony of textures and flavors that I, for one, absolutely adore. What is it about this particular treat that captures hearts and taste buds? I think it’s the perfect marriage of two beloved classics. Brownies offer that comforting, decadent chegrape juicess, while cheesecake brings its signature luxurious smoothness. The dark chocolate elevates both, adding a sophisticated edge that makes these Dark Chocolate Cheesecake Brownies truly irresistible. They’re the ultimate indulgence, the perfect balance of bold and creamy, and frankly, they’re incredibly satisfying to both make and devour. Get ready to fall in love with these glorious Dark Chocolate Cheesecake Brownies.
Ingredients:
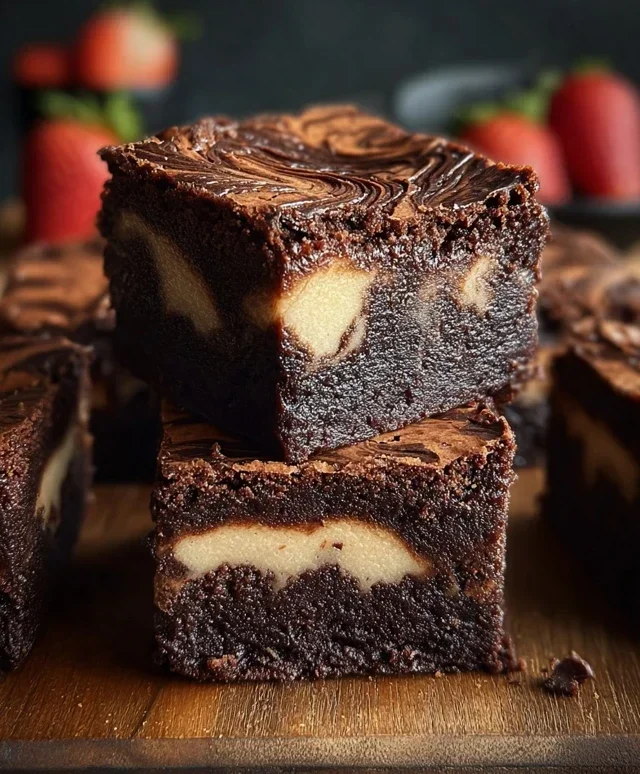
Dark Chocolate Cheesecake Brownies: A Decadent Dream
There are few things more universally loved than a rich, fudgy brownie. And then, there’s cheesecake. What if I told you we could combine these two titans of the dessert world into one utterly glorious creation? Enter the Dark Chocolate Cheesecake Brownie. These aren’t just any brownies; they’re an experience. A dense, intensely chocolatey base topped with a creamy, tangy swirl of cheesecake, all baked to perfection. This recipe is your ticket to brownie bliss with an elegant, cheesecake twist that will have everyone beggin extractg for the secret. Get ready to impress yourself and anyone lucky enough to share these with you.
Getting Started: Preparing Your Pan and Oven
Before we dive into the magical mixing, let’s set ourselves up for success. Preheat your oven to 350°F (175°C). This consistent temperature is key for even baking. Next, prepare an 8×8 inch baking pan. You can either generously grease it with butter or cooking spray, or even better, line it with parchment paper. Leave some overhang on the sides of the parchment paper. This is a fantastic trick that makes lifting the finished brownies out of the pan a breeze, allowing for easy slicing and minimal mess.
Crafting the Fudgy Brownie Base
The foundation of our indulgence begin extracts with the brownie batter. In a medium saucepan, melt the ½ cup of unsalted butter over low heat. Once melted, remove it from the heat and add the 1 cup of dark chocolate chips. Stir them gently until the chocolate is completely melted and the mixture is smooth and glossy. This is our intensely chocolatey base, so don’t skimp on the quality of your dark chocolate – it makes a difference!
In a separate bowl, whisk together ¾ cup of granulated sugar, 2 large eggs, and 1 tsp of vanilla extract until well combined and slightly frothy. This wet mixture will add moisture and richness to our brownies. Now, pour the melted chocolate and butter mixture into the sugar and egg mixture. Stir everything together until it’s beautifully homogenous.
In another small bowl, whisk together the ⅔ cup of all-purpose flour, 2 tbsp of cocoa powder, and ¼ tsp of salt. Sifting the flour and cocoa powder together can help prevent any lumps and ensure an even distribution of ingredients, leading to a smoother texture in your finished brownies. Gradually add this dry mixture to the wet chocolate mixture, folding it in gently until just combined. Be careful not to overmix the batter at this stage. Overmixing can develop the gluten in the flour, resulting in tougher brownies. We’re aiming for a dense, fudgy texture, so a light hand is best.
Whipping Up the Creamy Cheesecake Swirl
Now for the luxurious cheesecake layer. In a medium bowl, using an electric mixer or a sturdy whisk, beat the 8 oz of softened cream cheese until it’s completely smooth and creamy. This is important; any lumps of cream cheese will show up in your finished swirl. Make sure your cream cheese is truly softened – leave it at room temperature for at least an hour, or gently microwave it in 10-second bursts, checking frequently.
To the cream cheese, add ¼ cup of granulated sugar and ½ tsp of vanilla extract. Continue to beat until everything is well incorporated and the mixture is light and fluffy. Finally, add the 1 large egg and beat until just combined. Again, avoid overmixing once the egg is added.
Assembling and Swirling: The Art of Perfection
Pour the brownie batter into your prepared baking pan, spreading it evenly to cover the bottom. Don’t worry if it’s not perfectly smooth; the cheesecake layer will help with that.
Next, dollop spoonfuls of the cheesecake mixture over the brownie batter. Don’t be afraid to be a little messy here! You can use a spoon, a spatula, or even a piping bag for a more controlled approach.
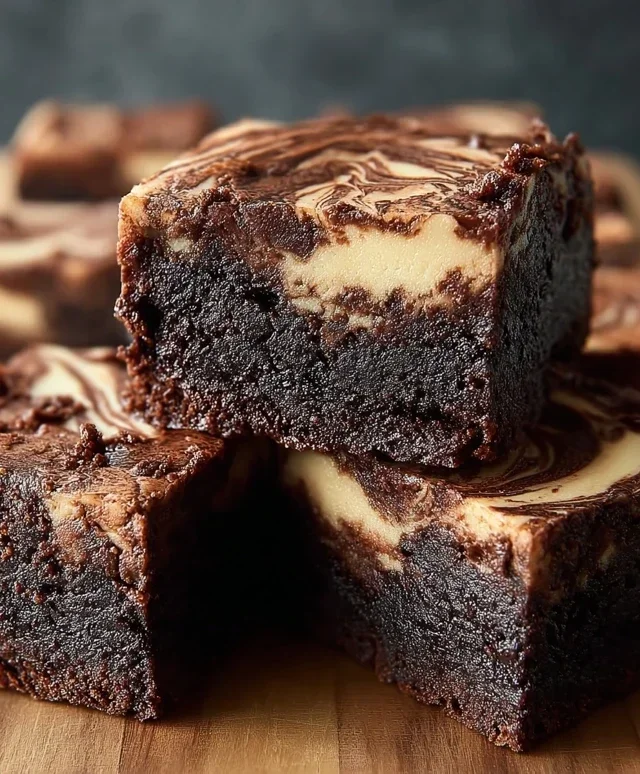
Now comes the fun part: the swirl! Take a toothpick, a butter knife, or the handle of a wooden spoon and gently swirl the cheesecake mixture into the brownie batter. Create beautiful marbled patterns. You can make big, sweeping swirls or smaller, more intricate designs. The key is to gently combine the two layers without overmixing them into one uniform color. Aim for distinct ribbons of brownie and cheesecake.
Baking to Golden Perfection
Carefully place the pan into your preheated oven. Bake for approximately 30-35 minutes. The brownies are ready when the edges are set and the cheesecake layer is firm to the touch. You might notice a few cracks on the cheesecake surface, which is perfectly normal and actually a sign of a good cheesecake! The center should still be slightly soft and fudgy. Avoid the temptation to overbake, as this will result in dry brownies and a tough cheesecake.
Once baked, remove the pan from the oven and let the brownies cool completely in the pan on a wire rack. This cooling process is crucial. It allows the brownies to set up properly and the flavors to meld. Rushing this step will likely lead to crum extractbly, messy brownies. For the cleanest slices, I highly recommend chilling the brownies in the refrigerator for at least 2-3 hours, or even overnight, before cutting.
When you’re ready to serve, use the parchment paper overhang to lift the entire slab out of the pan. Place it on a cutting board and use a sharp knife to cut them into squares. Wipe your knife clean between cuts for the neatest results. Enjoy every decadent bite of your homemade Dark Chocolate Cheesecake Brownies!
Conclusion:
There you have it – the ultimate recipe for Dark Chocolate Cheesecake Brownies! This dessert is an absolute showstopper, perfectly blending the rich, decadent depth of dark chocolate with the creamy, tangy delight of cheesecake. The contrast in textures, from the fudgy brownie base to the smooth cheesecake swirl, is truly divine, making every bite an explosion of flavor. Whether you’re a seasoned baker or just starting out, this recipe is surprisingly approachable and incredibly rewarding. The result is a dessert that’s both sophisticated and incredibly comforting, ideal for any occasion from a casual get-together to a special celebration.
I highly recommend serving these Dark Chocolate Cheesecake Brownies slightly warm, perhaps with a scoop of vanilla bean ice cream or a dollop of whipped cream for an extra layer of indulgence. For variations, consider adding a handful of fresh raspberries or cherries into the cheesecake batter for a fruity twist, or a sprinkle of sea salt on top before baking to enhance the chocolate notes even further. Don’t be afraid to experiment! I genuinely encourage you to give this recipe a try; you won’t be disappointed by these incredible Dark Chocolate Cheesecake Brownies.
Frequently Asked Questions:
Can I make these ahead of time?
Absolutely! These Dark Chocolate Cheesecake Brownies are fantastic when made a day in advance. The flavors meld beautifully overnight, and they’re just as delicious, if not more so, the next day. Store them in an airtight container at room temperature or in the refrigerator for longer storage.
What kind of dark chocolate should I use?
For the best flavor, I recommend using a good quality dark chocolate with at least 60-70% cocoa solids. This will give you that intense, rich chocolate experience that’s characteristic of these brownies. Avoid using chocolate chips unless they are specifically for baking, as they can contain stabilizers that affect the texture.
My cheesecake swirl isn’t very distinct. What did I do wrong?
Don’t worry if your swirl isn’t perfectly defined! Sometimes the batters can blend a bit. Ensure your cream cheese is softened to room temperature for a smoother cheesecake mixture, and try not to overmix when swirling. A gentle swirl with a knife or toothpick is all you need. The flavor will still be amazing!
Dark Chocolate Cheesecake Brownies
Decadent brownies swirled with rich dark chocolate cheesecake.
Ingredients
-
½ cup unsalted butter
-
1 cup dark chocolate chips
-
¾ cup granulated sugar
-
2 large eggs
-
1 tsp vanilla extract
-
⅔ cup all-purpose flour
-
2 tbsp cocoa powder
-
¼ tsp salt
-
8 oz cream cheese, softened
-
¼ cup granulated sugar
-
1 large egg
-
½ tsp vanilla extract
Instructions
-
Step 1
Preheat oven to 350°F (175°C). Grease and flour an 8×8 inch baking pan. -
Step 2
In a microwave-safe bowl, melt the ½ cup butter and 1 cup dark chocolate chips. Stir until smooth. Whisk in ¾ cup granulated sugar, 2 eggs, and 1 tsp vanilla extract. -
Step 3
In a separate bowl, whisk together ⅔ cup flour, 2 tbsp cocoa powder, and ¼ tsp salt. Gradually add dry ingredients to the chocolate mixture, stirring until just combined. -
Step 4
In another bowl, beat 8 oz cream cheese with ¼ cup granulated sugar, 1 egg, and ½ tsp vanilla extract until smooth. This is the cheesecake layer. -
Step 5
Pour half of the brownie batter into the prepared pan. Dollop spoonfuls of the cheesecake mixture over the brownie batter. Swirl the cheesecake and brownie batters together gently with a knife or toothpick. -
Step 6
Pour the remaining brownie batter over the swirled cheesecake layer and gently spread to cover. Bake for 30-35 minutes, or until a toothpick inserted into the center comes out with moist crumbs. -
Step 7
Let cool completely before cutting into squares.
Important Information
Nutrition Facts (Per Serving)
It is important to consider this information as approximate and not to use it as definitive health advice.
Allergy Information
Please check ingredients for potential allergens and consult a health professional if in doubt.