Easy Homemade Bread Recipe- Delicious & Simple
Homemade bread is more than just food; it’s an experience, a comforting aroma that fills your home and a deeply satisfying accomplishment. There’s a primal joy in transforming simple ingredients – flour, water, yeast, and salt – into a crusty, chewy masterpiece. For many of us, the love affair with homemade bread stems from the memories it evokes: grandma’s kitchen on a Sunday morning, the warmth of a freshly baked loaf shared with loved ones, or simply the quiet pleasure of tearing off a warm, fragrant piece. What makes this endeavor so special is the tangible connection it offers to tradition and the rewarding process of creation. It’s a testament to patience and a gentle reminder of the beauty found in the simple, honest things. Ready to embark on your own delicious journey with homemade bread?
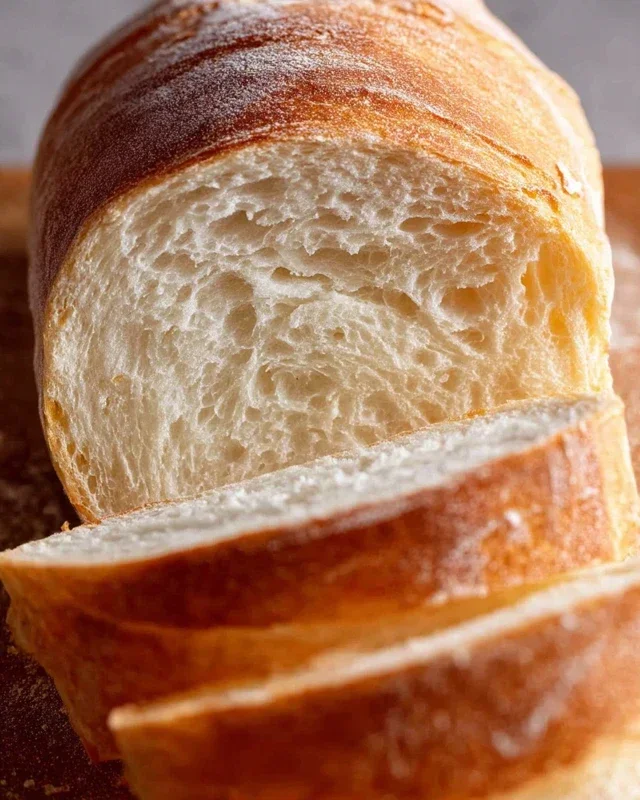
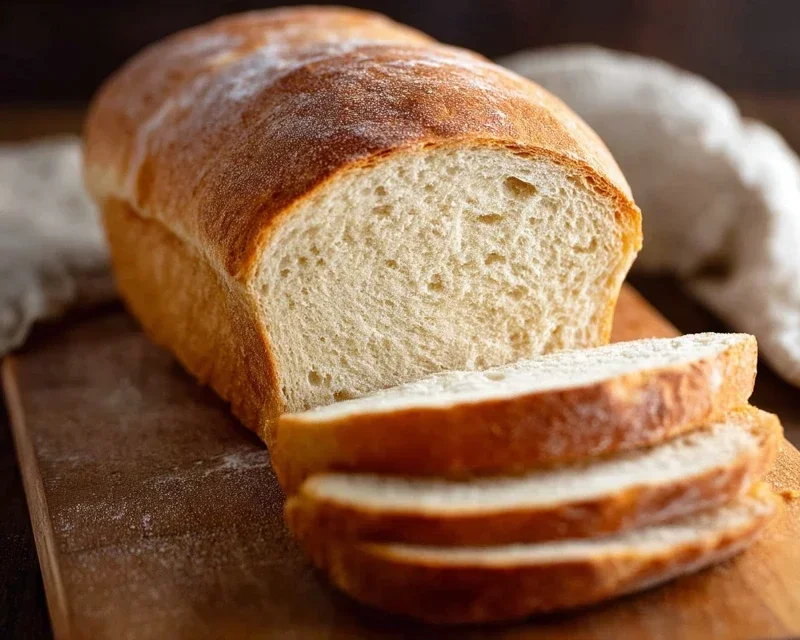
Homemade Bread
There’s a unique comfort and satisfaction that comes with pulling a golden, crusty loaf of homemade bread from your own oven. The aroma alone is enough to transform your kitchen into a haven of warmth and deliciousness. Forget those store-bought loaves that often lack soul; making bread from scratch is an incredibly rewarding culinary journey, and it’s far less intimidating than you might think. This recipe is a fantastic starting point for any aspiring home baker, yielding a classic, versatile loaf perfect for sandwiches, toast, or simply enjoyed with a smear of butter.
Ingredients:
*Note: Using bread flour will result in a chewier loaf with a more robust structure, ideal for sandwiches. All-purpose flour will produce a slightly softer crum extractb.
Getting Started: Activating the Yeast
The first crucial step in creating any good bread is ensuring your yeast is alive and kicking. This process, often called “blooming” or “proofing” the yeast, awakens it from its dormant state and prepares it to work its magic.
1. In a large mixing bowl, combine the warm water and your chosen sweetener (honey or sugar). The water temperature is important – too hot and you’ll kill the yeast, too cold and it won’t activate properly. Aim for that sweet spot between 105-115 degrees Fahrenheit. You can test this by dipping your clean finger in; it should feel pleasantly warm, not hot. Sprinkle the active dry yeast over the surface of the liquid. Do not stir it in immediately. Let it sit for about 5-10 minutes. You’ll know it’s ready when the mixture becomes foamy and bubbly, resembling a frothy head on a non-alcoholic beer. This visual cue tells you the yeast is active and ready to leaven your dough. If you don’t see this foam, your yeast may be old or the water temperature was off, and you should start again with fresh yeast.
Building the Dough: Mixing and Kneading
Once your yeast is happily frothing, it’s time to introduce the other ingredients and begin extract the transformation from a liquid mixture to a cohesive dough.
2. To the activated yeast mixture, add the salt and oil. Now, begin extract adding the flour, about one cup at a time, stirring with a sturdy spoon or spatula until it’s just incorporated. As you add more flour, the dough will start to become quite stiff and difficult to stir. Once the dough starts to pull away from the sides of the bowl and form a shaggy mass, it’s time to get your hands in there. You’ll likely need to use the lower end of the flour range at this point, adding more only as needed. The goal is a dough that is slightly sticky but manageable.
3. Turn the dough out onto a lightly floured surface. Now comes the part many find daunting but is actually quite meditative: kneading. This process develops the gluten in the flour, which is what gives bread its structure and chew. Push the dough away from you with the heels of your hands, then fold it back over itself. Rotate the dough a quarter turn and repeat. Continue this motion for about 8-10 minutes. The dough will transform from a rough, sticky mess into a smooth, elastic ball. It should feel supple and spring back slightly when you poke it with a finger. If it feels too sticky, add a tiny bit more flour to your hands and the surface. Conversely, if it feels too stiff and dry, you can dampen your hands with a little water and continue kneading. A well-kneaded dough is key to a great texture.
First Rise: Letting the Dough Do its Thing
The magic of yeast truly shines during the rising process. This is when the dough ferments, producing gases that make it expand and develop its characteristic airy texture.
4. Lightly grease a clean bowl with a little oil. Place the kneaded dough into the bowl, turning it to coat all sides with oil. This prevents a dry skin from forming on top. Cover the bowl tightly with plastic wrap or a clean, damp kitchen towel. Find a warm, draft-free spot for the dough to rise. An oven that has been turned off but still retains a little warmth, or a spot near a sunny window, works well. Allow the dough to rise for 1 to 1.5 hours, or until it has at least doubled in size. This can vary depending on the ambient temperature. You’ll know it’s ready when it looks significantly puffed up and feels airy to the touch. Gently poke it with your finger; if the indentation remains, it’s ready.
Shaping and Second Rise: Preparing for the Oven
Once the dough has had its first glorious rise, it’s time to give it its final shape and allow it to rest before baking.
5. Gently punch down the risen dough to deflate it. This helps to redistribute the gases and create a more even crum extractb. Turn the dough out onto your lightly floured surface again. Shape the dough into your desired loaf form – a classic round boule, a long baguette, or two smaller loaves. If you’re making a standard loaf pan bread, gently press the dough into an oval shape and then roll it up tightly, pinching the seam closed. Place the shaped dough into a greased loaf pan or onto a baking sheet lined with parchment paper. Cover loosely with plastic wrap or a clean kitchen towel and let it rise for a second time, about 30-45 minutes, or until it has nearly doubled in size. This second rise is crucial for achieving a light and airy interior. While the dough is undergoing its second rise, preheat your oven to 375 degrees Fahrenheit (190 degrees Celsius).
Baking the Perfect Loaf
The final stage is where the magic truly culminates, transforming the soft dough into a beautifully baked loaf.
6. Once the dough has completed its second rise and your oven is preheated, it’s time to bake. You can optionally brush the top of the loaf with a little egg wash or milk for a golden sheen, or sprinkle it with seeds if desired. Carefully place the loaf into the preheated oven. Bake for 30-40 minutes, or until the crust is a deep golden brown and the internal temperature of the bread reaches 195-200 degrees Fahrenheit (90-93 degrees Celsius) when measured with an instant-read thermometer. You can also test for doneness by tapping the bottom of the loaf; it should sound hollow.
Once baked, remove the bread from the oven and immediately turn it out onto a wire rack to cool completely. Resist the urge to slice into it while it’s still hot; allowing it to cool properly is essential for the crum extractb to set and for the flavors to develop fully. Enjoy the fruits of your labor – a truly magnificent loaf of homemade bread!
Conclusion:
You’ve now got the blueprint to create your own delicious, aromatic homemade bread right in your kitchen! This recipe is fantastic because it demystifies bread-making, offering a forgiving process that results in a wonderfully soft interior and a satisfyingly crisp crust. Imagin extracte the pride you’ll feel slicing into a loaf you baked yourself, filling your home with that irresistible aroma. It’s a truly rewarding experience. This versatile base is perfect for so many meals. Serve it warm with butter, alongside hearty soups and stews, or transform it into incredible sandwiches. Don’t be afraid to experiment with variations! Add herbs like rosemary or thyme, toss in some cheese for a savory twist, or incorporate seeds for added texture and flavor. The possibilities are truly endless once you’ve mastered the basics. So, gather your ingredients, preheat your oven, and give this homemade bread recipe a try. I promise you won’t be disappointed!
Frequently Asked Questions:
Why is my bread dense?
A common reason for dense bread is insufficient kneading or proofing. Make sure you’ve developed the gluten sufficiently by kneading until the dough is smooth and elastic. Also, allow the dough to rise in a warm place until it has doubled in size. Over-measuring flour can also lead to a dense loaf; it’s best to weigh your flour if possible.
Can I make this bread without a stand mixer?
Absolutely! While a stand mixer makes kneading easier, you can achieve excellent results with good old-fashioned hand-kneading. It takes a bit more effort but is incredibly satisfying. Just be patient and knead until the dough passes the windowpane test.
How long will homemade bread stay fresh?
Stored properly at room temperature in a bread box or a loosely senon-alcoholic aled bag, your homemade bread should stay fresh for about 2-3 days. For longer storage, you can slice the cooled loaf and freeze it. Reheat slices gently in the oven or toaster.
Homemade Bread
A simple and delicious recipe for homemade bread, perfect for beginners. This recipe yields a soft, fluffy loaf with a slightly chewy crust.
Ingredients
-
2 cups warm water (105-115 degrees)
-
1 Tablespoons active dry yeast
-
1/4 cup honey
-
2 teaspoons salt
-
2 Tablespoons canola oil
-
4 – 5 1/2 cups all-purpose flour
Instructions
-
Step 1
In a large bowl, combine the warm water and honey. Sprinkle the yeast over the top and let it sit for 5-10 minutes until frothy. -
Step 2
Stir in the salt and canola oil. -
Step 3
Gradually add the flour, about one cup at a time, mixing until a shaggy dough forms. You may not need all the flour. -
Step 4
Turn the dough out onto a lightly floured surface and knead for 5-7 minutes until it is smooth and elastic. Alternatively, if making a no-knead version, mix until just combined, cover, and let rest for 12-18 hours. -
Step 5
Place the dough in a greased bowl, cover with a clean cloth, and let it rise in a warm place for 1-1.5 hours, or until doubled in size. -
Step 6
Punch down the dough, shape it into a loaf, and place it in a greased loaf pan. Cover and let rise for another 30-45 minutes. -
Step 7
Preheat your oven to 375 degrees F (190 degrees C). Bake for 30-35 minutes, or until the crust is golden brown and the bread sounds hollow when tapped on the bottom. -
Step 8
Remove the bread from the pan and let it cool completely on a wire rack before slicing.
Important Information
Nutrition Facts (Per Serving)
It is important to consider this information as approximate and not to use it as definitive health advice.
Allergy Information
Please check ingredients for potential allergens and consult a health professional if in doubt.