Easy Chocolate Swiss Roll Recipe-Simple & Delicious Dessert
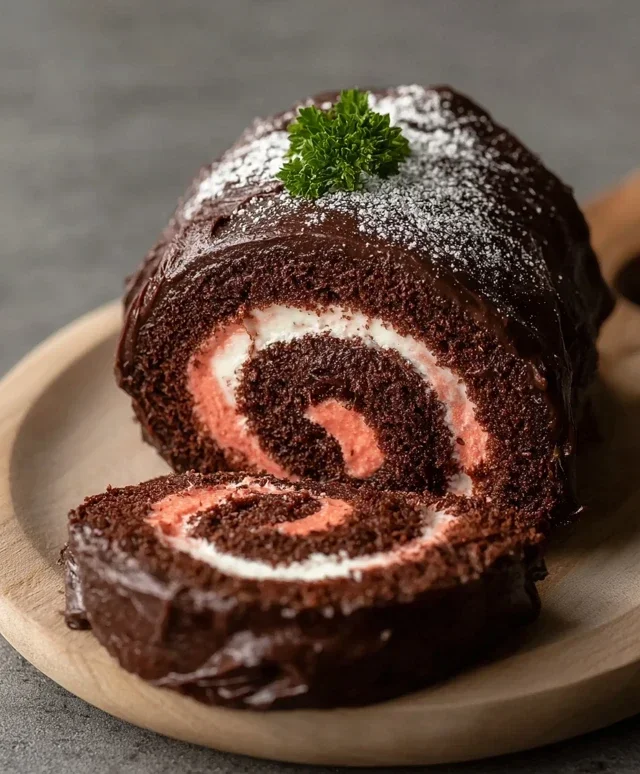
Easy Chocolate Swiss Roll recipes are a wonderful gateway into the magical world of home baking, proving that impressive desserts don’t have to be complicated. Who doesn’t adore a beautifully swirled, impossibly light chocolate sponge cake, generously filled and rolled into a delightful treat? The charm of a Swiss roll lies in its elegant presentation and its deceptively simple preparation. It’s that perfect balance of rich chocolate flavor and airy texture that makes it a perennial favorite for celebrations, afternoon teas, or just because. Forget those intimidating patisserie masterpieces; this easy Chocolate Swiss Roll is designed for success, even if you’re a begin extractner baker. We’re talking about a recipe that delivers pure joy without the fuss, a showstopper you can whip up with confidence, and a guaranteed crowd-pleaser that tastes every bit as good as it looks. Get ready to impress yourself and everyone around you!
Easy Chocolate Swiss Roll
Craving a delightful chocolate treat that’s surprisingly easy to make and caters to various dietary needs? Look no further than this Easy Chocolate Swiss Roll! This recipe uses a clever combination of flours for a tender crum extractb and aquafaba to achieve that classic light and airy sponge. The rich chocolate flavor is balanced beautifully by a luscious dairy-free buttercream and a vibrant strawberry garnish. Whether you’re a seasoned baker or a begin extractner, this recipe is designed to be approachable and incredibly rewarding. Let’s get started on creating this showstopper!
Ingredients:
The Chocolate Sponge
This is the foundation of our Swiss roll, and it’s designed to be light, moist, and intensely chocolatey. The combination of oat and cassava flour provides a lovely texture without being heavy, while the aquafaba whips up into a surprisingly stable meringue, giving us that signature airy sponge.
1. Preheat your oven to 180°C (350°F). Line a 30×40 cm (12×16 inch) Swiss roll pan or a baking sheet with parchment paper, leaving a slight overhang on the sides for easy lifting. Lightly grease the parchment paper and the sides of the pan. This double-layer of preparation ensures your cake releases beautifully. Dust the entire inside of the prepared pan, including the parchment, with the 2 tablespoons of cocoa powder. This step is crucial for preventing sticking and adding an extra layer of chocolate goodness to the outside of your cake.
2. In a medium bowl, whisk together the oat flour, cassava flour, 30g of cocoa powder, arrowroot starch, baking powder, and baking soda. Ensure there are no lumps, especially in the cocoa powder. Set this dry ingredient mixture aside. In a separate, large bowl, combine the aquafaba, 100g of the granulated sugar (or coconut sugar), unsweetened applesauce, and dairy-free yogurt. Whisk vigorously with an electric mixer on medium-high speed until the mixture is thick, pnon-alcoholic ale, and forms stiff peaks. This process is similar to whipping egg whites and can take anywhere from 5 to 8 minutes. You want a glossy, meringue-like consistency.
3. Gently fold about a third of the dry ingredients into the aquafaba mixture using a spatula. Be careful not to overmix; you want to incorporate the flour without deflating the airy aquafaba. Once partially combined, add the remaining dry ingredients and fold them in until just incorporated. The batter should be smooth and lump-free, but still airy. Pour the batter evenly into the prepared and cocoa-dusted Swiss roll pan, spreading it gently to the edges. Tap the pan lightly on the counter a couple of times to release any large air bubbles.
4. Bake for 12-15 minutes, or until the cake springs back when lightly touched and a toothpick inserted into the center comes out clean. The cake should be golden brown and slightly puffed. While the cake is baking, lay a clean kitchen towel flat on your work surface and dust it generously with the remaining 2 tablespoons of cocoa powder. This is your “rolling” towel, and the cocoa powder will prevent the cake from sticking to it as it cools and is rolled.
5. As soon as the cake is out of the oven, carefully invert it onto the prepared, cocoa-dusted kitchen towel. Immediately peel off the parchment paper. If any bits stick, you can gently press them back into place. While the cake is still warm, carefully roll it up with the towel inside, starting from one of the shorter ends. Let the rolled cake cool completely on a wire rack. This cooling process while rolled helps to set the shape and prevent cracking when you unroll it later for filling.
Strawberry Cream Cheese Frosting
This frosting is a delightful surprise, offering a tangy and sweet counterpoint to the rich chocolate sponge. The freeze-dried strawberries lend an intense, natural strawberry flavor and a beautiful pink hue.
1. Ensure your vegan butter and the solidified coconut fat from your full-fat coconut cream are at room temperature. In a large bowl, beat the room temperature vegan butter until light and fluffy using an electric mixer. Scrape down the sides of the bowl occasionally.
2. Gradually add the 100g of remaining granulated sugar (or coconut sugar) to the butter, beating until well combined and creamy. Then, add the solidified coconut fat from the chilled coconut cream. Beat again until thoroughly incorporated and the frosting is smooth and spreadable. If your coconut fat is very firm, you might need to gently soften it slightly before adding.
3. Finally, add the pulsed freeze-dried strawberries. Beat on low speed initially to incorporate them without sending powder everywhere, then increase to medium-high speed and beat until the frosting is smooth, well combined, and has a lovely pink hue. Taste and adjust sweetness if desired. If the frosting seems too soft, you can chill it in the refrigerator for about 15-20 minutes until it reaches a spreadable consistency.
Assembly
This is where the magic happens, transforming your cooled sponge into a beautiful Swiss roll.
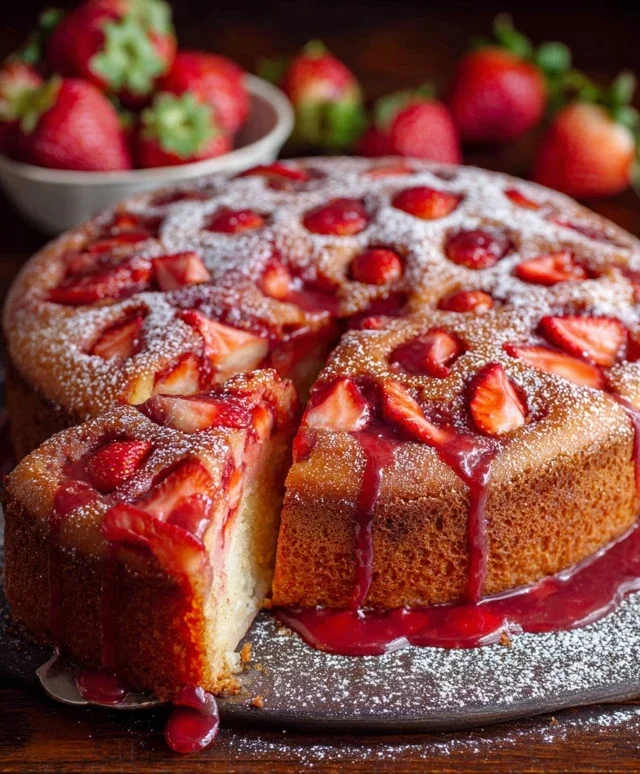
1. Gently unroll the cooled chocolate sponge. It might crack slightly, which is perfectly normal. Don’t worry about it; the frosting will cover any imperfections. Spread the strawberry frosting evenly over the surface of the cake, leaving a small border around the edges. Scatter the sliced strawberries over the frosting.
2. Carefully re-roll the cake, this time without the towel, starting from the same end you began rolling. Use the kitchen towel to help guide and tighten the roll as you go. Place the rolled Swiss roll seam-side down on a serving platter. You can trim the ends to create neat edges if you like. For an extra touch of elegance, you can dust the top with a little extra cocoa powder or a sprinkle of your freeze-dried strawberry powder. Chill the Swiss roll in the refrigerator for at least 30 minutes before slicing and serving. This allows the frosting to set and makes slicing much easier.
Enjoy your delicious and impressive Easy Chocolate Swiss Roll! It’s a fantastic dessert for any occasion.

Conclusion:
And there you have it! This easy chocolate Swiss roll is a fantastic dessert that truly lives up to its name. It’s surprisingly straightforward to make, even for begin extractner bakers, and delivers a wonderfully moist chocolate cake with a luscious creamy filling. The visual appeal alone is a winner, making it perfect for special occasions or simply as a delightful treat to brighten your day. I love how versatile it is too – you can adapt the filling and decorations to suit your taste or the season.
For serving, I highly recommend dusting it with a little extra cocoa powder or powdered sugar. A dollop of fresh whipped cream and a few fresh berries are also classic accompaniments that never go wrong. If you’re feeling adventurous, consider adding a swirl of chocolate ganache over the top for an extra decadent touch. Thinking about variations? You can easily switch out the chocolate for a vanilla or even a lemon-flavored cake and filling. Cocoa powder can be swapped for espresso powder for a mocha twist, or even finely chopped nuts folded into the batter.
I truly encourage you to give this easy chocolate Swiss roll a try. It’s a rewarding bake that will impress your friends and family, and most importantly, taste absolutely delicious. Don’t be intimidated by the rolling; it’s more forgiving than you might think, and the results are so worth it!
Frequently Asked Questions:
Why is my Swiss roll cracking when I roll it?
Cracking often happens if the cake is overbaked, or if it cools too much before you attempt to roll it. Make sure to bake it just until a toothpick comes out with a few moist crum extractbs attached, and try rolling it while it’s still warm but not piping hot. You can also try using a clean tea towel dusted with powdered sugar underneath the parchment paper as you roll.
Can I make the chocolate Swiss roll ahead of time?
Yes, absolutely! You can bake and cool the cake layer completely and store it at room temperature, wrapped tightly in plastic wrap, for up to a day. The filling can also be made a day in advance and stored in the refrigerator. Assemble the Swiss roll a few hours before serving to allow the flavors to meld.
Easy Chocolate Swiss Roll
A simple and delicious vegan chocolate swiss roll using oat and cassava flour, with a creamy coconut-based filling and fresh strawberry garnish.
Ingredients
-
135 g oat flour
-
30 g cassava flour
-
30 g cocoa powder
-
1 tbsp arrowroot starch
-
1 1/2 tsp baking powder
-
1/2 tsp baking soda
-
122 mL aquafaba, room temperature
-
200 g organic granulated sugar or coconut sugar, divided
-
100 g unsweetened applesauce, room temperature
-
60 g unsweetened dairy free yogurt, room temperature
-
2 tbsp cocoa powder for dusting the dish towel
-
1 cup sliced strawberries, for garnish
-
226 g vegan butter, room temperature
-
70 g freeze dried strawberries, pulsed into a flour
-
Coconut fat from 1 can full-fat coconut cream
Instructions
-
Step 1
Preheat oven to 350°F (175°C). Line a 10×15 inch jelly roll pan with parchment paper and grease lightly. Dust a clean kitchen towel with 2 tbsp cocoa powder. -
Step 2
In a large bowl, whisk together oat flour, cassava flour, 30g cocoa powder, arrowroot starch, baking powder, and baking soda. -
Step 3
In a separate bowl, whisk aquafaba until foamy. Gradually add 100g of the sugar and continue whisking until stiff peaks form, similar to meringue. -
Step 4
Gently fold the dry ingredients into the aquafaba mixture until just combined. Fold in applesauce and dairy-free yogurt. -
Step 5
Pour batter into the prepared pan and spread evenly. Bake for 12-15 minutes, or until a toothpick inserted into the center comes out clean. -
Step 6
Immediately invert the cake onto the cocoa-dusted towel. Carefully peel off the parchment paper. Roll the cake up with the towel and let it cool completely. -
Step 7
While the cake cools, prepare the filling. In a bowl, cream together room temperature vegan butter and the coconut fat from the chilled coconut cream. Gradually add the remaining 100g sugar and pulsed freeze-dried strawberries, beating until smooth and creamy. -
Step 8
Once the cake is completely cool, unroll it. Spread the filling evenly over the cake. Arrange sliced strawberries along one edge. -
Step 9
Carefully re-roll the cake, this time without the towel. Place seam-side down on a serving platter. Garnish with additional strawberries if desired.
Important Information
Nutrition Facts (Per Serving)
It is important to consider this information as approximate and not to use it as definitive health advice.
Allergy Information
Please check ingredients for potential allergens and consult a health professional if in doubt.