Homemade Caesar Salad Dressing- Easy & Delicious
Homemade Caesar salad dressing is a revelation. Forget those bottled imposters that lack the zing and character of the real deal. There’s a reason why the Caesar salad reigns supreme on menus worldwide – and it all comes down to that creamy, tangy, umami-rich dressing. It’s the magical elixir that transforms simple romaine lettuce into a culinary masterpiece. I’ve always been captivated by its complex flavor profile: the salty bite of anchovy (don’t knock it ’til you try it!), the sharp tang of Parmesan, the richness of egg yolk, and that whisper of garlic. Making your own homemade Caesar salad dressing isn’t just about superior taste; it’s about control over ingredients and the satisfying accomplishment of crafting something truly delicious from scratch. Get ready to elevate your salad game.
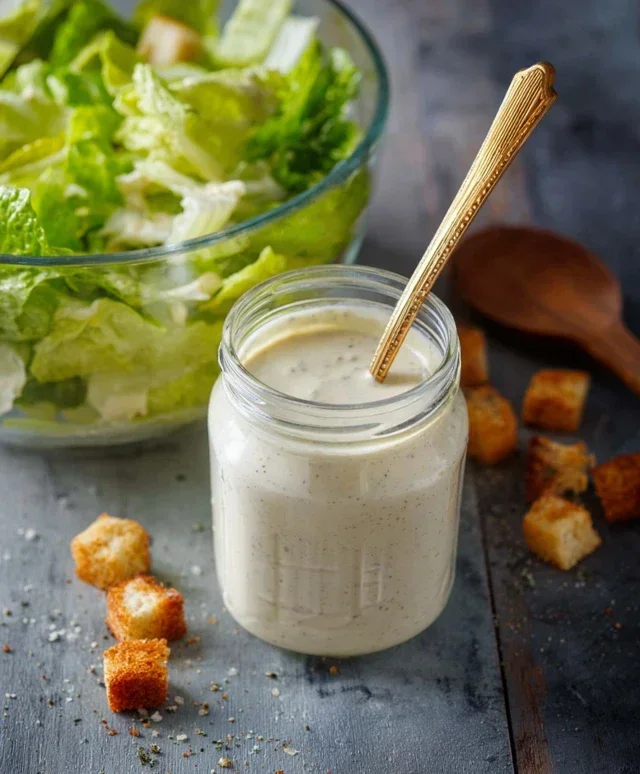
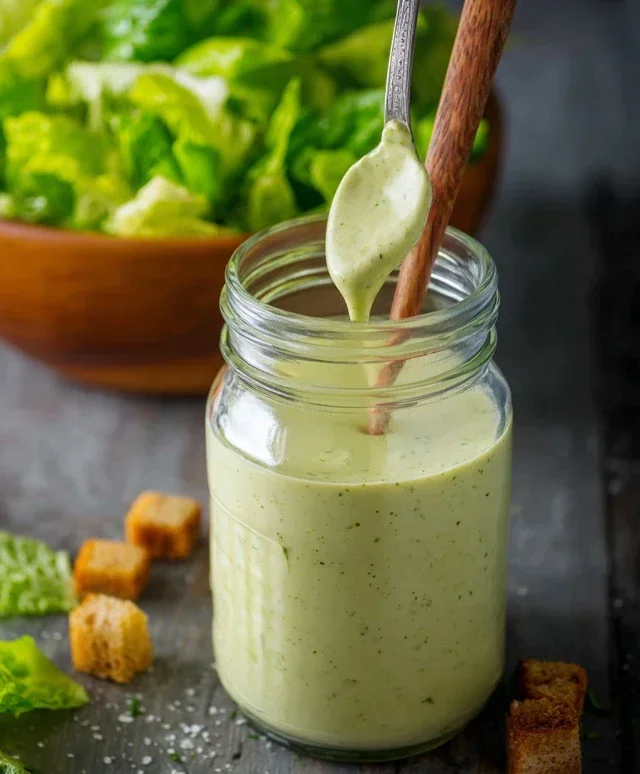
Homemade Caesar Salad Dressing
There’s something undeniably special about a perfectly executed Caesar salad. The creamy, tangy dressing is the star of the show, bringin extractg together crisp romaine, crunchy croutons, and salty Parmesan. While store-bought dressings can be convenient, nothing truly compares to the vibrant flavor of homemade Caesar dressing. It’s surprisingly simple to make and allows you to control the quality of your ingredients, resulting in a dressing that’s leagues above anything you’ll find in a bottle. This recipe is my go-to for a reason: it’s rich, balanced, and bursts with authentic Caesar flavor. Get ready to elevate your salad game!
Ingredients:
Crafting the Creamy Base
The foundation of any great Caesar dressing is a well-emulsified base that is both creamy and stable. We’ll start by whisking together the egg yolks, Dijon mustard, and minced garlic. The egg yolks provide richness and act as an emulsifier, helping to bind the oil and other ingredients together. Room temperature egg yolks are crucial here; they will incorporate more smoothly into the dressing and reduce the risk of the dressing breaking. The Dijon mustard adds a subtle tang and also helps with emulsification. Don’t skip the garlic – it’s essential for that signature Caesar bite. Mincing it finely or grating it on a microplane will ensure its flavor is evenly distributed without any overpowering chunks.
Building the Flavor Profile
Next, we’ll introduce the key flavor components that define a classic Caesar. Add the fresh lemon juice for a bright, acidic counterpoint to the richness of the egg yolks and olive oil. The Worcestershire sauce brings a layer of umami and complexity, while the anchovy paste (or mashed anchovy fillets) is non-negotiable for authentic Caesar flavor. Don’t be afraid of the anchovy! It doesn’t make the dressing taste fishy; instead, it adds a deep, savory, and briny depth that is absolutely essential. If you’re particularly sensitive, start with a little less and add more to your taste. Whisk these ingredients together thoroughly until everything is well combined.
The Art of Emulsification
Now comes the most important part: emulsifying the oil. This is where the magic happens, transforming a collection of ingredients into a cohesive, creamy dressing. Begin extract by slowly, almost drop by drop, drizzling in the extra virgin extract extract olive oil while continuously whisking. This slow addition is critical. If you add the oil too quickly, the dressing will break, meaning the oil and liquid components will separate. As you whisk, you’ll notice the mixture begin extractning to thicken and transform into a beautiful, pnon-alcoholic ale yellow, creamy emulsion. Once you’ve added about half of the olive oil in this slow, steady stream, you can start to add the remaining oil in a slightly thicker, but still gradual, stream, continuing to whisk vigorously. The goal is to create a stable emulsion that holds together. The quality of your extra virgin extract extract olive oil will also play a role in the final flavor and texture, so using a good one is recommended.
Incorporating the Finishing Touches
Once your dressing has reached a luscious, creamy consistency, it’s time to add the final flavor boosters. Stir in the finely grated Parmesan cheese. The cheese adds another layer of salty, nutty flavor that is synonymous with Caesar salad. Make sure you’re using finely grated Parmesan, as it will melt more easily into the dressing. Season generously with salt and freshly ground black pepper. Taste and adjust as needed. You might find you need a little more lemon juice for brightness, more Worcestershire for depth, or even a touch more anchovy if you’re feeling bold. The beauty of homemade dressing is its adaptability to your personal preferences.
Resting and Serving Your Masterpiece
For the best flavor development, I highly recommend letting your Caesar dressing rest in the refrigerator for at least 30 minutes before serving. This allows the flavors to meld together and deepen. When you’re ready to serve, give it another good whisk, as it may thicken slightly in the refrigerator. This homemade Caesar salad dressing is fantastic not just on classic Caesar salads, but also as a dip for vegetables, a marinade for chicken or fish, or even tossed with pasta. Store any leftover dressing in an airtight container in the refrigerator for up to 3-4 days. Enjoy the unparalleled taste of your homemade creation!
Conclusion:
And there you have it – your very own, incredibly delicious, homemade Caesar salad dressing! This recipe is fantastic because it allows you to control every ingredient, ensuring a fresh, vibrant flavor that store-bought versions simply can’t match. The creamy emulsion, balanced tang from the lemon and Worcestershire, and the savory punch of anchovy and Parmesan create a truly irresistible taste. It’s perfect for elevating your classic Caesar salad, but don’t stop there! Try it as a dip for roasted vegetables, a marinade for chicken or fish, or even a flavorful binder for potato salad. I highly encourage you to give this homemade Caesar salad dressing a try; you’ll be amazed at how easy it is and how much better it tastes!
Frequently Asked Questions:
What if I don’t have anchovy paste?
No problem! You can finely mince a couple of anchovy fillets instead. The flavor will be just as wonderful, and the paste is simply a convenient form. If you’re entirely avoiding anchovies, a tiny pinch of MSG or a bit more Worcestershire sauce can provide some of that umami depth, though it won’t be a true Caesar.
Can I make this dressing ahead of time?
Absolutely! This homemade Caesar salad dressing keeps beautifully in an airtight container in the refrigerator for up to a week. The flavors often meld and deepen even further over time, making it even more delicious on the second day. Just give it a good whisk or shake before serving.
How can I make a dairy-free or vegan version?
To make a dairy-free version, omit the Parmesan cheese and use a good quality vegan Parmesan alternative. For a fully vegan Caesar salad dressing, you’ll also need to substitute the anchovy paste. Nutritional yeast can provide a cheesy flavor, and a bit of tamari or soy sauce can add umami. Consider a dash of capers for brine. Experiment with these substitutions to find your perfect vegan rendition!
Homemade Caesar Salad Dressing
A classic, creamy, and flavorful homemade Caesar salad dressing made with pantry staples.
Ingredients
-
1 large egg yolk
-
2 cloves garlic, minced
-
1 teaspoon Dijon mustard
-
1/4 cup lemon juice
-
1/2 teaspoon Worcestershire sauce
-
1/2 cup extra virgin olive oil
-
1/4 cup grated Parmesan cheese
-
Salt to taste
-
Black pepper to taste
Instructions
-
Step 1
In a medium bowl, whisk together the egg yolk, minced garlic, Dijon mustard, lemon juice, and Worcestershire sauce until well combined. -
Step 2
Slowly drizzle in the extra virgin olive oil while continuously whisking. Continue whisking until the dressing emulsifies and thickens. -
Step 3
Stir in the grated Parmesan cheese. -
Step 4
Season with salt and freshly ground black pepper to taste. Adjust seasonings as needed. -
Step 5
For a thinner dressing, whisk in a teaspoon or two of water. -
Step 6
Serve immediately over your favorite salad or store in an airtight container in the refrigerator for up to 3 days.
Important Information
Nutrition Facts (Per Serving)
It is important to consider this information as approximate and not to use it as definitive health advice.
Allergy Information
Please check ingredients for potential allergens and consult a health professional if in doubt.