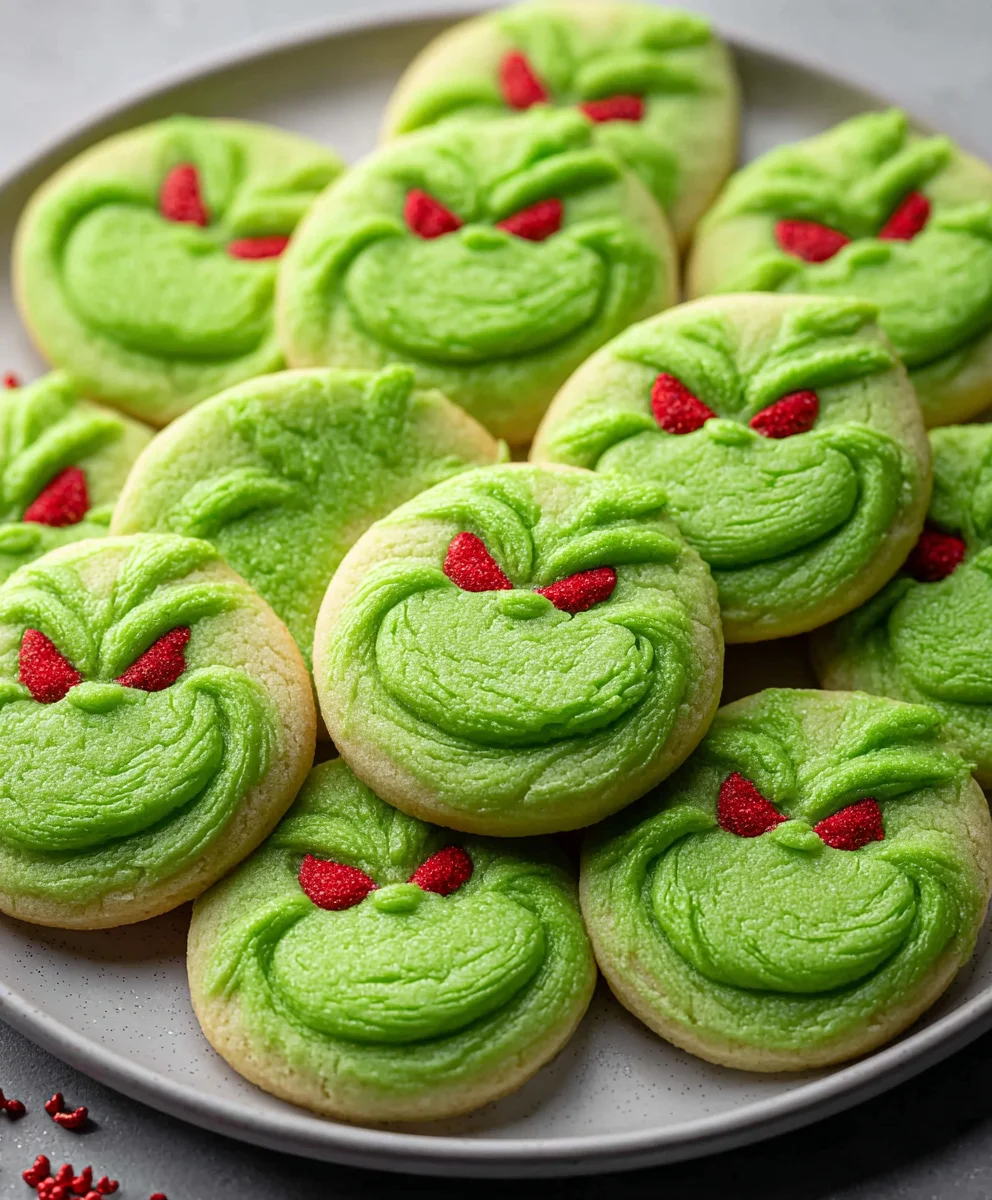
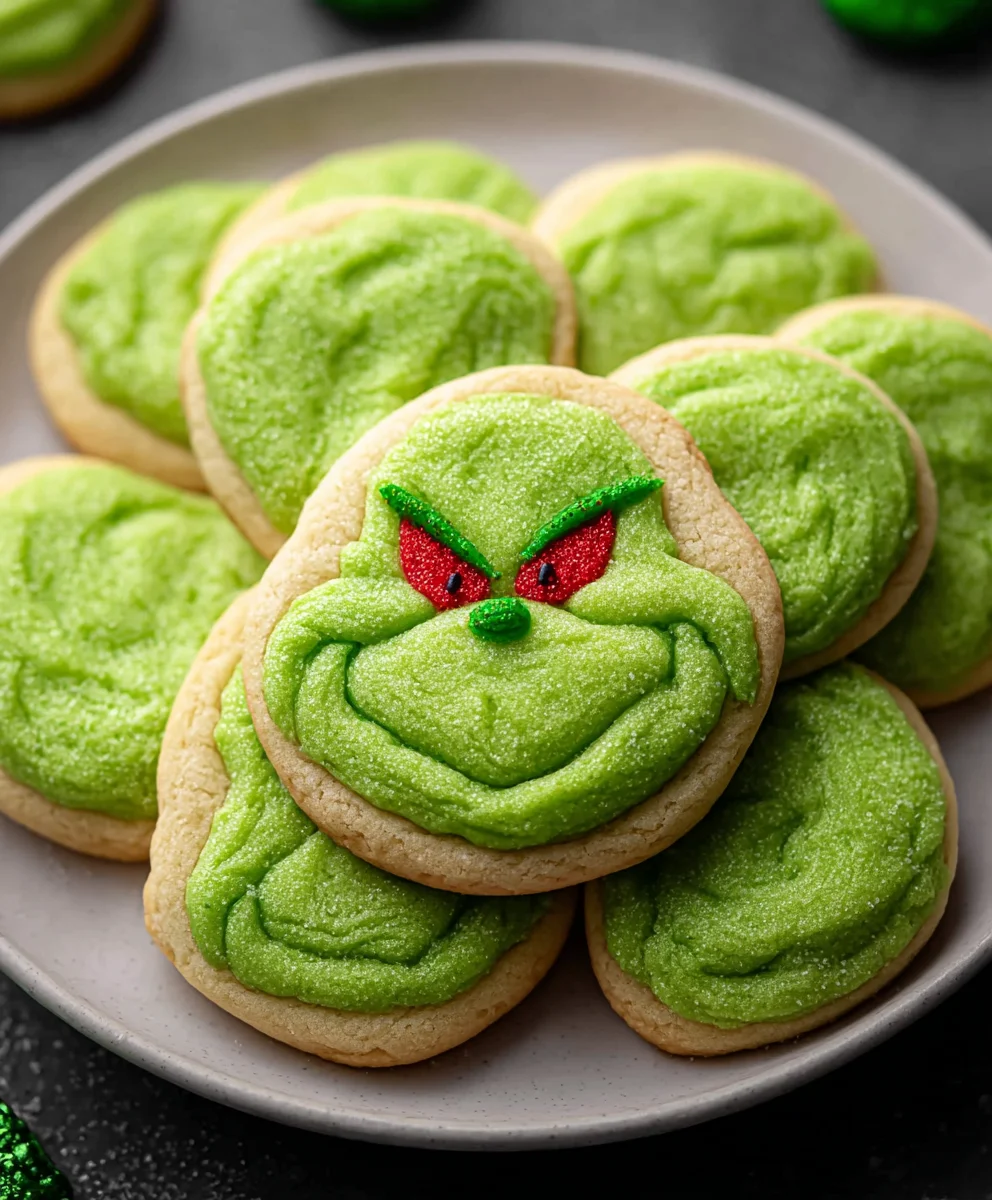
Grinch Sugar Cookies- Easy Festive Holiday Treat
Grinch Sugar Cookies are more than just a festive treat; they’re a vibrant explosion of holiday cheer that brings smiles to faces young and old. There’s something undeniably magical about these iconic green delights, don’t you think? The simple, sweet flavor of a perfectly baked sugar cookie, combined with that unmistakable Grinchy hue, creates a sensory experience that’s pure joy. What makes Grinch Sugar Cookies so beloved is their playful spirit. They aren’t just cookies; they’re edible artwork, embodying the whimsical spirit of Dr. Seuss and the heartwarming transformation of the Grinch himself. Whether you’re decorating them with classic red and white stripes or getting creative with extra sprinkles, each bite is a reminder of the fun and magic of the holiday season. Get ready to embrace your inner baker and create these delightful cookies that are guaranteed to be the star of any holiday gathering!
Ingredients:
- 1 stick (8 tablespoons) unsalted butter, softened
- ⅔ cup granulated sugar, plus extra for rolling
- 2 large egg yolks
- 1 teaspoon vanilla extract
- 3-5 drops green food gel coloring
- 1¼ cups all-purpose flour
- ½ teaspoon baking soda
- ¼ teaspoon fine salt
- 12 red heart sprinkles
Preparing the Grinch Cookie Dough
Creaming the Butter and Sugar
Begin extract by taking your softened unsalted butter and placing it into a medium-sized mixing bowl. It’s important that the butter is softened but not melted, as this allows it to cream properly with the sugar, incorporating air which leads to a lighter cookie texture. Add the ⅔ cup of granulated sugar to the bowl with the butter. Using an electric mixer, whether a stand mixer with a paddle attachment or a hand mixer, beat the butter and sugar together on medium speed for about 2 to 3 minutes. You’re looking for the mixture to become light and fluffy, with a pnon-alcoholic ale yellow color. This process is crucial for developing the cookie’s structure and sweetness. Scrape down the sides of the bowl occasionally to ensure all the ingredients are evenly incorporated.
Incorporating the Wet Ingredients
Once your butter and sugar mixture is light and fluffy, it’s time to add the egg yolks and vanilla extract. Add the two large egg yolks to the bowl one at a time, beating well after each addition until fully combined. Egg yolks contribute richness and help bind the cookie dough. Next, pour in the 1 teaspoon of vanilla extract. Vanilla adds that classic sweet aroma and flavor that complements the sugar and butter perfectly. Beat this mixture again until everything is smoothly incorporated. The batter might look a little less fluffy at this stage, which is perfectly normal.
Achieving the Grinchy Hue
This is where our Grinch Sugar Cookies get their signature color! Add 3 to 5 drops of green food gel coloring to the wet ingredients. Gel coloring is preferred over liquid coloring because it’s more concentrated and won’t add excess moisture to the dough, which could affect the cookie’s texture. Start with 3 drops and mix thoroughly. If you desire a more vibrant or deeper green, add another drop or two until you achieve your perfect Grinch green. Remember, you can always add more color, but you can’t take it away, so proceed cautiously. Mix until the color is uniformly distributed throughout the batter.
Adding the Dry Ingredients
Combining Dry Components
In a separate, smaller bowl, whisk together the 1¼ cups of all-purpose flour, ½ teaspoon of baking soda, and ¼ teaspoon of fine salt. Whisking the dry ingredients together ensures that the baking soda and salt are evenly distributed throughout the flour, which is essential for consistent leavening and flavor in your cookies. Baking soda acts as a leavening agent, helping the cookies to spread and rise slightly, while salt enhances all the other flavors and balances the sweetness.
Combining Wet and Dry Mixtures
Gradually add the dry ingredient mixture to the wet ingredient mixture. It’s best to add it in about three additions, mixing on low speed after each addition until just combined. Be careful not to overmix the dough at this stage. Overmixing can develop the gluten in the flour too much, resulting in tough cookies. You’re looking for a soft, cohesive dough that holds together when you press it. It should still be slightly sticky but manageable. If the dough seems too wet to handle, you can add an extra tablespoon of flour, but do so sparingly.
Shaping and Baking the Grinch Cookies
Chilling and Rolling the Dough
Once your dough is combined, it’s important to chill it. Wrap the dough tightly in plastic wrap and flatten it into a disc. Refrigerate for at least 30 minutes, or up to 2 days. Chilling the dough makes it firmer and easier to handle, preventing it from spreading too much during baking. When you’re ready to bake, preheat your oven to 350°F (175°C). Line baking sheets with parchment paper to prevent sticking. On a lightly floured surface, roll out the chilled dough to about ¼-inch thickness. Use your favorite cookie cutters to create your desired shapes. For a classic Grinch cookie, you might opt for heart shapes or even small character shapes.
Decorating and Baking
Carefully transfer the cut-out cookies to your prepared baking sheets, leaving about 1-2 inches between each cookie to allow for slight spreading. Now, for the whimsical touch! Take your 12 red heart sprinkles and gently press one onto the center of each cookie. This adds a festive and thematic detail that truly brings the Grinch spirit to life. Place the baking sheets in the preheated oven and bake for 8 to 10 minutes, or until the edges are lightly golden brown and the centers are set. The exact baking time will depend on the size and thickness of your cookies. Keep a close eye on them to avoid overbaking.
Cooling and Enjoying
Once baked, remove the cookies from the oven and let them cool on the baking sheets for about 5 minutes. This allows them to firm up further before you move them. Then, carefully transfer the cookies to a wire rack to cool completely. While they are still warm, you can roll any extra cookies in granulated sugar for a sparkly finish. Once completely cool, your delightful Grinch Sugar Cookies are ready to be enjoyed! They are perfect for holiday parties, cookie exchanges, or just for a fun baking project.
Conclusion:
And there you have it! Your very own batch of delightful Grinch Sugar Cookies, ready to bring some festive cheer and a touch of Grinchy fun to any occasion. We’ve walked through the simple steps to create these iconic cookies, ensuring a perfect balance of buttery sweetness and a tender, melt-in-your-mouth texture. Don’t be shy to get creative with your decorating! These cookies are not just a treat for your taste buds, but a canvas for your imagin extractation. Whether you’re hosting a holiday party, preparing a care package for a loved one, or simply craving a sweet escape, these Grinch Sugar Cookies are sure to be a hit. For a delightful serving suggestion, pair them with a tall glass of cold milk or a warm cup of hot chocolate for the ultimate cozy experience. Feel free to experiment with different shades of green food coloring or add a sprinkle of edible glitter for an extra sparkle. Remember, baking is an adventure, and these Grinch Sugar Cookies are your ticket to a wonderfully whimsical journey.
Frequently Asked Questions about Grinch Sugar Cookies:
Q: Can I make the dough for these Grinch Sugar Cookies ahead of time?
Absolutely! The dough for Grinch Sugar Cookies can be made up to 2-3 days in advance. Once chilled, wrap it tightly in plastic wrap and store it in the refrigerator. Allow it to soften slightly at room temperature for about 15-20 minutes before rolling and cutting for the best results.
Q: My Grinch Sugar Cookies spread too much while baking. What did I do wrong?
This is a common issue! Several factors can contribute to spreading. Ensure your butter and sugar are not over-creamed, as this can incorporate too much air. Also, make sure your baking soda is fresh. Chilling the cut-out cookies for about 10-15 minutes on the baking sheet before baking can also help prevent excessive spreading.
Grinch Sugar Cookies- Easy Festive Holiday Treat
Easy and festive Grinch sugar cookies perfect for the holidays. These green cookies with red heart sprinkles are a fun and delicious treat.
Ingredients
-
1 stick (8 tablespoons) unsalted butter, softened
-
⅔ cup granulated sugar, plus extra for rolling
-
2 large egg yolks
-
1 teaspoon vanilla extract
-
3-5 drops green food gel coloring
-
1¼ cups all-purpose flour
-
½ teaspoon baking soda
-
¼ teaspoon fine salt
-
12 red heart sprinkles
Instructions
-
Step 1
Cream softened butter and granulated sugar in a medium bowl with an electric mixer on medium speed for 2-3 minutes until light and fluffy. -
Step 2
Add egg yolks one at a time, beating well after each addition. Stir in vanilla extract until smoothly incorporated. -
Step 3
Add 3-5 drops of green food gel coloring and mix until uniformly distributed. Add more drops if a deeper green is desired. -
Step 4
In a separate bowl, whisk together all-purpose flour, baking soda, and fine salt. Gradually add dry ingredients to wet ingredients in three additions, mixing on low speed until just combined. Do not overmix. -
Step 5
Wrap dough tightly in plastic wrap, flatten into a disc, and refrigerate for at least 30 minutes. Preheat oven to 350°F (175°C) and line baking sheets with parchment paper. -
Step 6
On a lightly floured surface, roll out chilled dough to about ¼-inch thickness. Use cookie cutters to create shapes. Transfer cookies to prepared baking sheets, leaving space between them. -
Step 7
Gently press one red heart sprinkle onto the center of each cookie. Bake for 8-10 minutes, or until edges are lightly golden brown and centers are set. -
Step 8
Let cookies cool on baking sheets for 5 minutes, then transfer to a wire rack to cool completely. Optionally, roll warm cookies in granulated sugar for a sparkly finish.
Important Information
Nutrition Facts (Per Serving)
It is important to consider this information as approximate and not to use it as definitive health advice.
Allergy Information
Please check ingredients for potential allergens and consult a health professional if in doubt.