Crispy Korean Fried Chicken Recipe-Best Flavor
Korean fried chicken recipe, oh how I love thee! If you’ve ever experienced the magic of this iconic dish, you know exactly what I’m talking about. It’s more than just chicken; it’s a symphony of textures and flavors that dances on your palate. We’re talking about that impossibly crispy, shatteringly thin coating that gives way to incredibly juicy, tender meat. What sets Korean fried chicken apart from its Western counterparts? It’s the double-frying technique, which ensures that unparalleled crunch, and the irresistible sweet, spicy, and often garlicky glaze that coats every single piece. It’s the ultimate comfort food, perfect for sharing (or not!) with friends, or just indulgin extractg in a solo flavor adventure. Get ready to elevate your weeknight dinner with this incredible Korean fried chicken recipe!
Korean Fried Chicken Recipe
Get ready to experience a taste sensation that will have you hooked! Korean Fried Chicken, or “chikin” as it’s affectionately known, is a world away from your average fried chicken. Forget heavy batter and greasy textures; Korean fried chicken is all about a super light, incredibly crispy coating and a flavor-packed punch. This recipe focuses on creating that signature crunch that stays intact even when coated in a glorious glaze. We’ll be using chicken breast for a leaner option, sliced into perfect strips for optimal frying and saucing. So, let’s dive in and get this deliciousness started!
Ingredients:
Cooking Instructions
Step 1: Marinate the Chicken
The first crucial step to tender and flavorful chicken is a good marinade. In a medium bowl, combine the buttermilk, 1/2 teaspoon of salt, 1/4 teaspoon of white pepper, and 1/4 teaspoon of garlic salt. Add your sliced chicken breast strips to this mixture, ensuring each piece is fully submerged. The buttermilk acts as a tenderizer, breaking down the chicken fibers to make them incredibly succulent. It also provides a slightly tangy base that complements the other flavors. Cover the bowl and refrigerate for at least 30 minutes, or ideally for 1 to 2 hours. This resting period allows the flavors to penetrate the chicken, making every bite more delicious.
Step 2: Prepare the Crispy Coating
While the chicken is marinating, it’s time to get our dredgin extractg station ready. In a large shallow dish or a resealable plastic bag, combine the plain flour, 1 teaspoon of salt, 1 teaspoon of ground black pepper, 1/2 teaspoon of garlic salt, 1/2 teaspoon of celery salt, 1 teaspoon of dried thyme, 1 teaspoon of paprika, 1 teaspoon of baking powder, and 1 teaspoon of chilli flakes. Whisk everything together thoroughly until well combined. The baking powder is a secret weapon here; it helps to create a lighter, crispier coating by producing small bubbles during frying. The celery salt adds a subtle savory depth, and the paprika and chilli flakes contribute a gentle warmth and color to the coating. Make sure all the dry ingredients are evenly distributed.
Step 3: Dredge and Rest the Chicken
Once the chicken has marinated, remove it from the buttermilk, letting any excess drip off. Do not wipe it dry. The slightly wet surface of the chicken is perfect for the flour mixture to adhere to. Working in batches to avoid overcrowding the pan later, take a piece of chicken and place it into the flour mixture. Toss it around, pressing gently to ensure the flour coats every surface. You want a good, even coating. Once coated, place the floured chicken strips onto a wire rack set over a baking sheet. Here’s another important tip for maximum crispiness: let the dredged chicken rest for about 10-15 minutes at room temperature. This resting period allows the moisture from the chicken to hydrate the flour, creating a paste-like layer that will fry up incredibly crispy.
Step 4: Deep Frying to Perfection
Now for the fun part – frying! Pour your chosen neutral oil into a large, heavy-bottomed pot or Dutch oven, ensuring there’s enough depth for the chicken to be fully submerged. Heat the oil to 175°C (350°F). You can test this by dropping a tiny bit of the flour mixture into the oil; it should sizzle immediately and float to the surface. Carefully, using tongs, place a few pieces of the dredged chicken into the hot oil. Do not overcrowd the pot, as this will lower the oil temperature and result in greasy, soggy chicken. Fry the chicken in batches for about 5-7 minutes per batch, or until golden brown and cooked through. The internal temperature should reach 74°C (165°F). As each batch is done, remove the chicken from the oil using a slotted spoon and place it back onto the wire rack to drain any excess oil. This is crucial for maintaining that signature crisp.
Step 5: Achieve Double-Fried Magic (Optional but Recommended!)
For an absolutely unbeatable crunch that will last, consider a double fry. After you’ve fried all the chicken the first time and placed it on the wire rack, let it rest for about 5 minutes. Then, reheat your oil to 190°C (375°F). Carefully return the chicken pieces to the hot oil, again in batches, and fry for an additional 1-2 minutes. This second fry will give the chicken an extra layer of golden crispiness that is truly spectacular. You’ll notice the color deepening and the texture becoming even more pronounced. Once removed from the oil, place them back on the wire rack to drain.
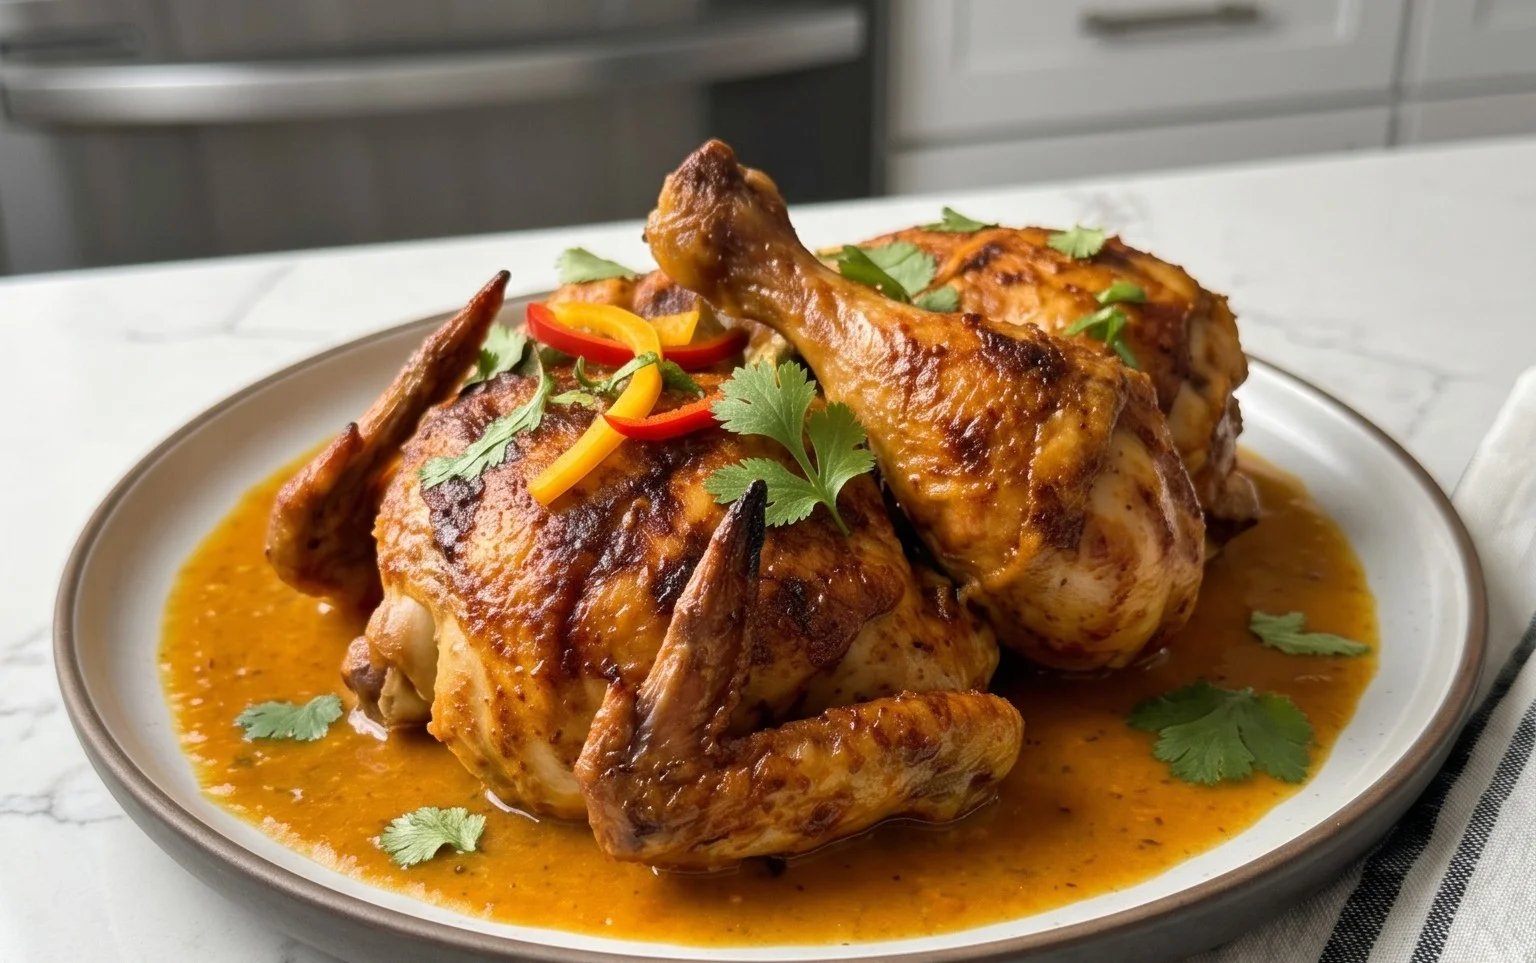
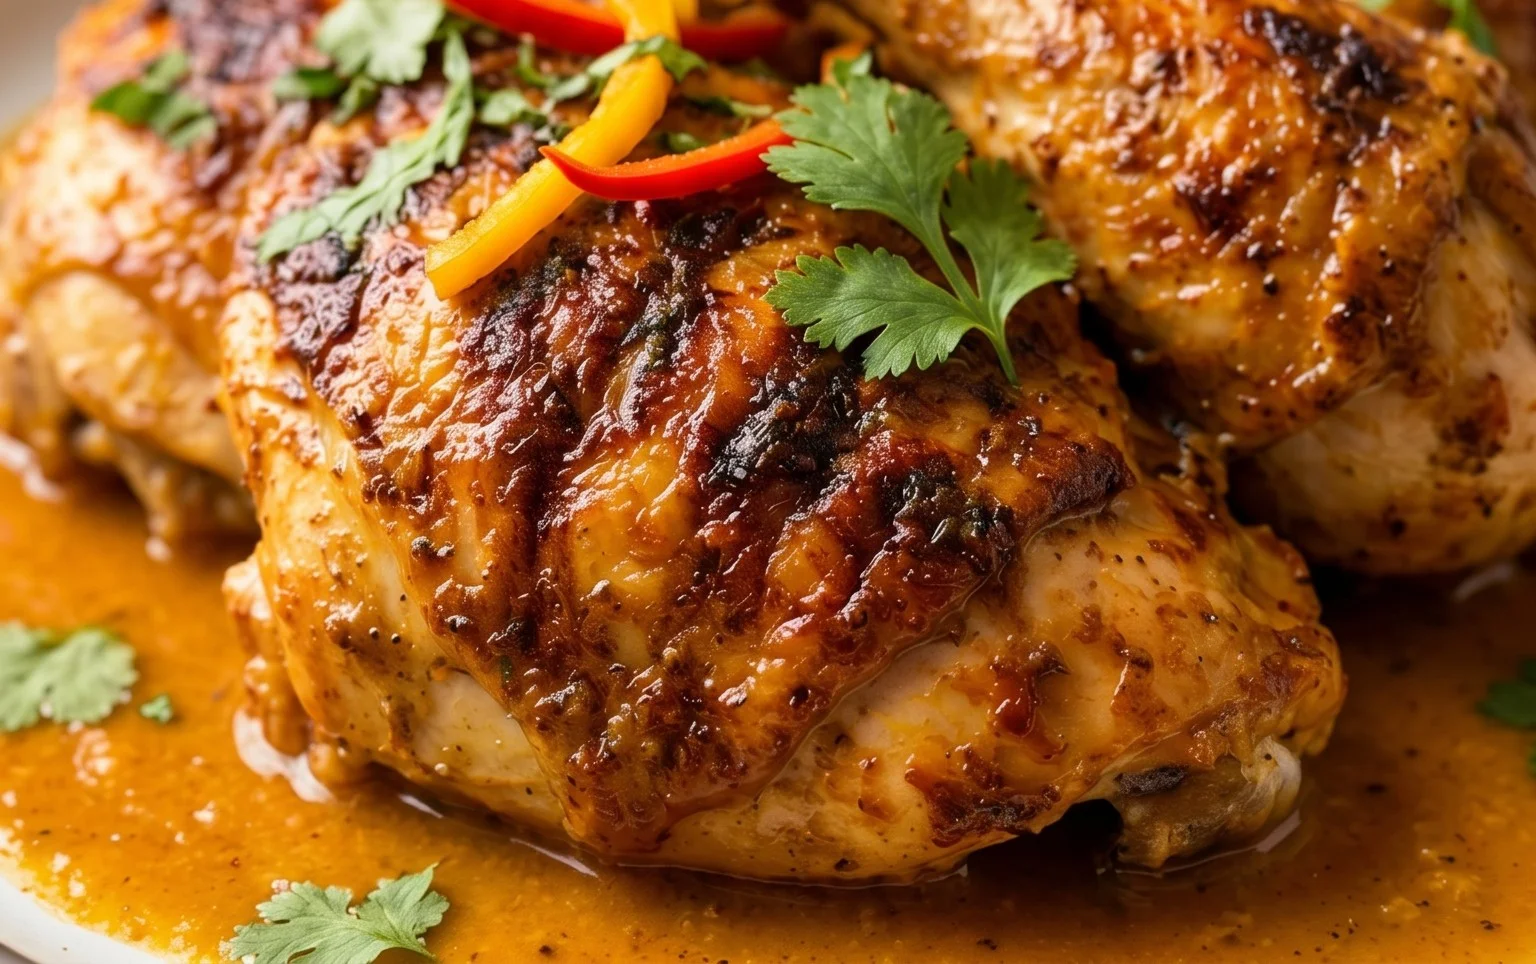
At this point, your Korean fried chicken is ready to be sauced and devoured! You can serve it as is for a pure, unadulterated crispy experience, or toss it in your favorite Korean glaze – think sweet and spicy gochujang-based sauces, or a tangy soy-garlic concoction. Enjoy this incredibly addictive dish!
Conclusion:
So there you have it – your definitive guide to making unbelievably delicious Korean Fried Chicken right in your own kitchen! This recipe delivers that signature ultra-crispy, impossibly thin batter that shatters with every bite, perfectly coating tender, juicy chicken. It’s a labor of love, yes, but the reward is so worth it. The versatility of this Korean Fried Chicken recipe means you can customize it to your heart’s content. Serve it up as the star of your next game night, a weekend treat, or even a unique appetizer. Think about pairing it with a crisp, cold non-alcoholic beer and some pickled radishes for that authentic experience. Don’t be afraid to experiment with different sauces – honey garlic, spicy gochujang, or even a sweet soy glaze are all fantastic choices. I truly encourage you to give this recipe a go; it’s a fantastic way to elevate your home cooking and impress yourself and your loved ones.
Frequently Asked Questions:
Can I make this Korean Fried Chicken ahead of time?
While Korean Fried Chicken is best enjoyed fresh and hot for maximum crispiness, you can prepare some components in advance. The chicken can be marinated and even coated in the dry ingredients a few hours ahead and kept in the refrigerator. However, for the best texture, I recommend frying the chicken just before serving.
What if I don’t have potato starch?
Potato starch is key to achieving that signature thin, shatteringly crisp crust. If you absolutely cannot find it, cornstarch is the closest substitute, though the texture might be slightly different, perhaps a bit more powdery. You could also try a blend of cornstarch and all-purpose flour, but potato starch really is the star for this particular Korean Fried Chicken.
How spicy is the gochujang sauce?
The spiciness of the gochujang sauce can vary depending on the brand of gochujang you use and how much you add. This recipe provides a balanced amount, but if you’re sensitive to heat, start with less and gradually add more to taste. You can also mellow the spice by adding a touch more honey or a splash of water.
Korean Fried Chicken Recipe
Crispy, flavorful Korean-style fried chicken with a spicy, sweet glaze. This recipe focuses on achieving that perfect crunch and delicious coating.
Ingredients
-
4 chicken breasts ((approx 700g or 1.5lb) sliced into long thick strips)
-
240 ml (1 cup) buttermilk
-
1/2 tsp salt
-
1/4 tsp white pepper
-
1/4 tsp garlic salt
-
180 g (1 1/2 cups) plain (all-purpose) flour
-
1 tsp salt
-
1 tsp ground black pepper
-
1/2 tsp garlic salt
-
½ tsp celery salt
-
1 tsp dried thyme
-
1 tsp paprika
-
1 tsp baking powder
-
1 tsp chilli flakes
-
oil for deep frying ((at least 1 litre/four cups) I use avocado oil, but other neutral oils such as sunflower or canola work too.)
Instructions
-
Step 1
In a bowl, combine the chicken strips with buttermilk, 1/2 tsp salt, 1/4 tsp white pepper, and 1/4 tsp garlic salt. Marinate for at least 15 minutes, or up to 30 minutes in the refrigerator. -
Step 2
In a separate large bowl, whisk together the plain flour, 1 tsp salt, 1 tsp ground black pepper, 1/2 tsp garlic salt, ½ tsp celery salt, 1 tsp dried thyme, 1 tsp paprika, 1 tsp baking powder, and 1 tsp chilli flakes. -
Step 3
Remove chicken pieces from the buttermilk, letting excess drip off. Dredge each piece thoroughly in the flour mixture, ensuring it’s fully coated. Shake off any excess flour. -
Step 4
Heat at least 1 litre (4 cups) of oil in a deep, heavy-bottomed pot or Dutch oven over medium-high heat until it reaches approximately 175°C (350°F). Use a thermometer for accuracy. -
Step 5
Carefully add the floured chicken pieces to the hot oil, being careful not to overcrowd the pot. Fry in batches for about 4-6 minutes per side, or until golden brown and cooked through. -
Step 6
Remove the fried chicken from the oil and place it on a wire rack set over a baking sheet to drain any excess oil. Repeat with the remaining chicken.
Important Information
Nutrition Facts (Per Serving)
It is important to consider this information as approximate and not to use it as definitive health advice.
Allergy Information
Please check ingredients for potential allergens and consult a health professional if in doubt.