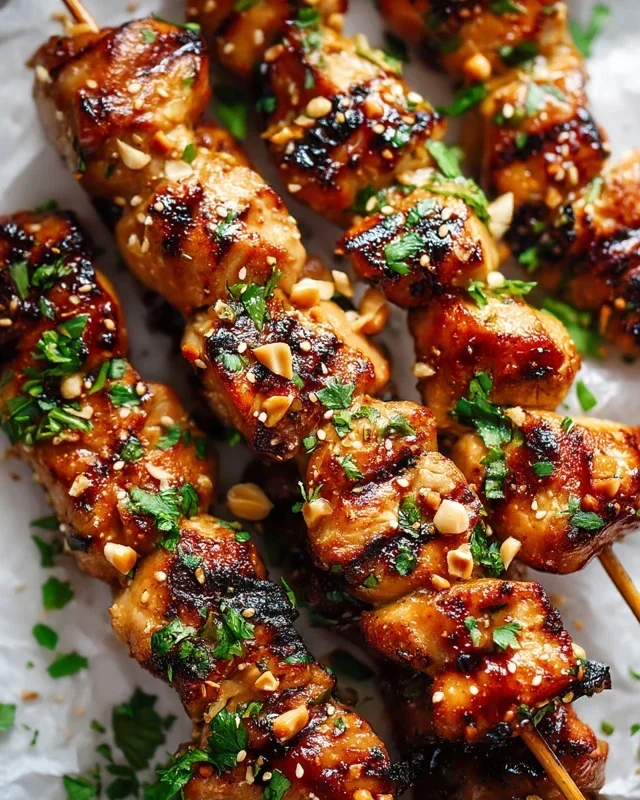
Authentic Peruvian Chicken- Flavorful & Easy
Peruvian Chicken, also known as Pollo a la Brasa, is a culinary phenomenon that has captured hearts and taste buds worldwide. If you’ve ever had the pleasure of experiencing its vibrant flavors and impossibly tender meat, you understand the obsession. What is it about this iconic dish that makes it so beloved? It’s the incredible marinade, a magical blend of garlic, cumin, oregano, and a touch of aji amarillo (a Peruvian yellow chili pepper), that infuses every bite with a complex, slightly smoky, and utterly addictive profile. This isn’t just roasted chicken; it’s an experience. The crispy, golden-brown skin crackles with every mouthful, giving way to juicy, succulent meat that practically melts off the bone. Making authentic Peruvian Chicken at home is more achievable than you might think, and the aroma that fills your kitchen will have everyone eagerly anticnon-alcoholic ipating this unforgettable meal.
Peruvian Chicken Recipe
Peruvian cuisine is a vibrant tapestry of flavors, and at its heart often lies the incredible versatility and deliciousness of chicken. My go-to for a weeknight meal that feels special, or for a weekend gathering, is this Peruvian-inspired chicken. It’s incredibly tender, bursting with savory and slightly spicy notes, and the creamy cilantro sauce is an absolute game-changer. You might know it by other names, like Pollo a la Brasa, but this version is designed for home cooks, bringin extractg that authentic taste right to your kitchen. The secret lies in the marinade, which tenderizes the chicken and infuses it with a complex flavor profile that’s both comforting and exciting.
Ingredients:
Marinating the Chicken
The foundation of this fantastic dish is the marinade. This is where we build the depth of flavor that will permeate every bite of the chicken. In a medium bowl, I like to start by combining the wet ingredients: the soy sauce, lime juice, and olive oil. These three form a great base, with the lime juice adding a crucial brightness and helping to tenderize the chicken. Next, I add the aromatics and spices. The 5 cloves of peeled garlic are going to lend a pungent, savory punch. I like to give them a rough chop before adding them to the bowl. Then, we have the dry spices: cumin, paprika, and dried oregano. These bring warmth and a subtle smokiness to the marinade. Cumin is particularly important in Peruvian cooking, offering an earthy depth. Don’t forget a generous grinding of black pepper, adjusting it to your preference for heat.
Now, for the chicken itself. Patting the chicken thighs dry with paper towels is a good first step. This helps the marinade adhere better. I then place the chicken thighs into a large resealable plastic bag or a non-reactive bowl. Pour the prepared marinade over the chicken, ensuring each piece is well coated. Massage the marinade into the chicken to really get it into all the nooks and crannies. For the best flavor, I recommend marinating the chicken for at least 30 minutes at room temperature, or ideally, in the refrigerator for 2 to 4 hours. If you’re marinating for longer, up to 8 hours is also excellent, but avoid going much longer than that as the lime juice can start to “cook” the chicken and change its texture.
Preparing the Creamy Cilantro Sauce
While the chicken is marinating, it’s the perfect time to whip up the magical creamy cilantro sauce. This sauce is what truly elevates this dish and makes it undeniably Peruvian. In a blender or food processor, combine the 3 roughly chopped jalapeños. Remember to remove the seeds and ribs if you prefer a milder sauce. I like to leave a few seeds in for a little kick! Add the fresh cilantro leaves. You want about a packed cup of leaves – don’t be shy with the cilantro, it’s a star here! Next, add the 2 peeled cloves of garlic. Then comes the creamy element: the mayonnaise and Greek yogurt. The mayonnaise provides richness and helps emulsify the sauce, while the Greek yogurt adds a lovely tang and a lighter consistency. Give it all a good blend until it’s smooth and vibrant green. You can add a tablespoon or two of water if the sauce is too thick for your liking. Taste and adjust seasoning with salt and a little more lime juice if needed. This sauce is fantastic served warm or at room temperature.
Cooking the Peruvian Chicken
Once the chicken has finished marinating and the sauce is ready, it’s time to cook. I find that pan-searing followed by a brief bake is the most effective way to get beautifully browned and cooked-through chicken thighs. Preheat your oven to 400 degrees Fahrenheit (200 degrees Celsius). Heat a tablespoon of olive oil in a large, oven-safe skillet over medium-high heat.
Remove the chicken thighs from the marinade, letting any excess drip off. Don’t discard the marinade, though! We’ll use a little bit of it later. Carefully place the chicken thighs into the hot skillet, making sure not to overcrowd the pan. You may need to cook them in batches. Sear the chicken for about 3-4 minutes per side, until it develops a nice golden-brown crust. This searing step is crucial for developing flavor and creating a delicious texture.
Once all the chicken has been seared, return all the pieces to the skillet. You can brush them with a little of the reserved marinade if you like, but be mindful of not adding too much liquid, as it can steam the chicken instead of roasting it. Transfer the skillet to the preheated oven. Bake for 15-20 minutes, or until the chicken is cooked through and the internal temperature reaches 165 degrees Fahrenheit (74 degrees Celsius). The exact cooking time will depend on the thickness of your chicken thighs. You want them to be juicy and tender, not dry.
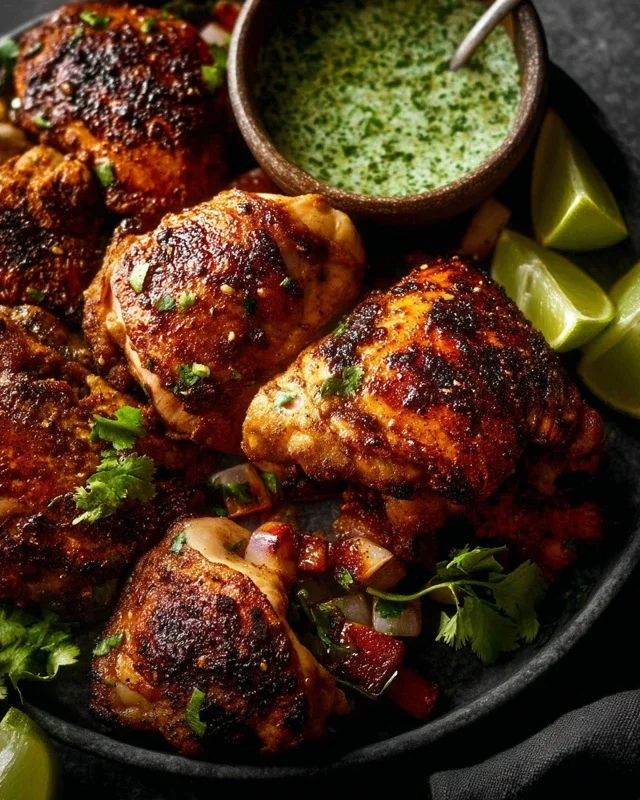
Serving Your Peruvian Chicken
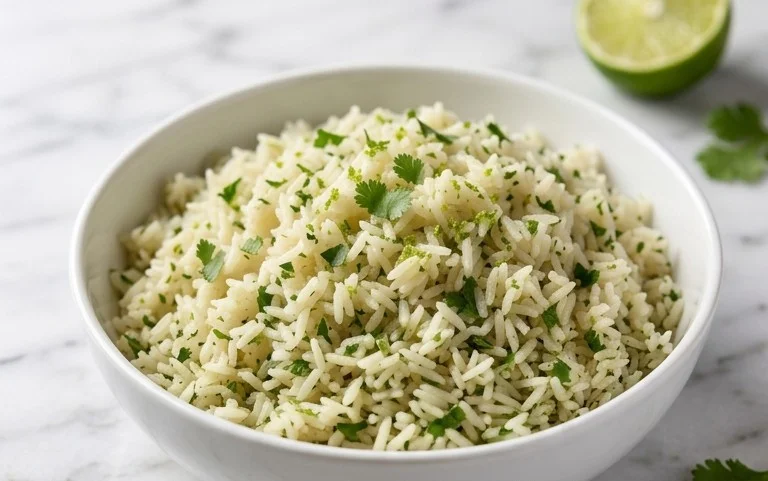
Let the chicken rest for a few minutes after it comes out of the oven. This allows the juices to redistribute, making the chicken even more succulent. While the chicken is resting, you can gently warm the cilantro sauce if desired, though it’s delicious at room temperature too. Serve the Peruvian chicken thighs hot, generously drizzled with the creamy cilantro sauce. This dish is wonderfully versatile and pairs beautifully with a variety of sides. Think fluffy white rice, roasted potatoes, a simple green salad, or even some fried plantains for an extra touch of tropical flair. The vibrant flavors of the chicken and the bright, herbaceous sauce make every bite an adventure. Enjoy this taste of Peru right in your own home!
Conclusion:
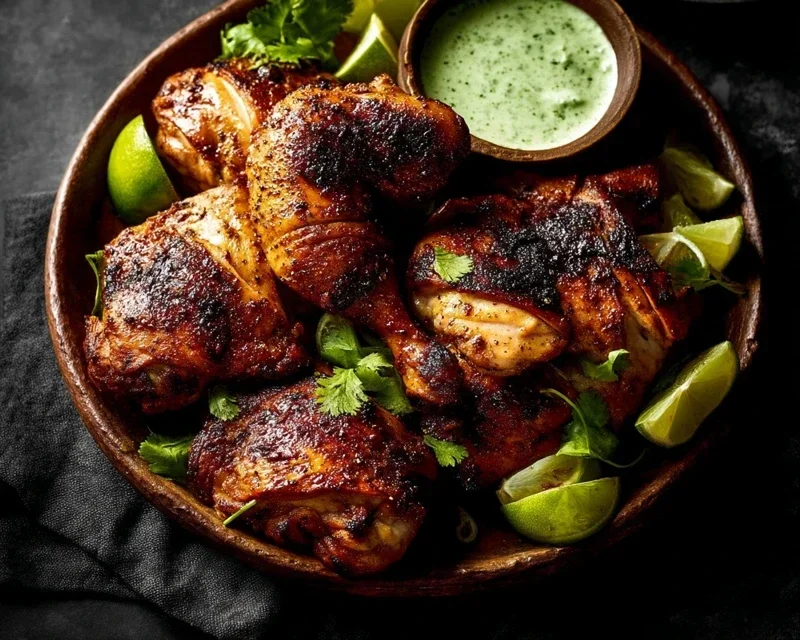
So there you have it – a delicious and approachable Peruvian Chicken recipe that’s sure to become a weeknight favorite! This dish truly shines with its vibrant flavors, tender chicken, and the delightful kick of its signature marinade. It’s incredibly satisfying without being overly complicated, making it perfect for both seasoned cooks and those looking to expand their culinary horizons. I’ve found that the aroma alone as it bakes is enough to get everyone excited for dinner!
Serving this Peruvian Chicken is a joy. It pairs beautifully with fluffy white rice, a simple green salad, or even some roasted sweet potatoes. For a more traditional experience, don’t forget some aji verde sauce on the side!
If you’re feeling adventurous, consider experimenting with variations. You could add a pinch of smoked paprika to the marinade for an extra layer of depth, or even grill the chicken instead of baking for a smoky char. The possibilities are endless, and I encourage you all to give this fantastic Peruvian Chicken recipe a try. You won’t be disappointed!
Frequently Asked Questions:
What is the signature Peruvian marinade made of?
The classic Peruvian marinade, often called Adobo or Salsa de Aji Amarillo, typically features a blend of lime juice, vinegar, garlic, cumin, and the star ingredient: aji amarillo paste. This yellow chili pepper paste provides a unique fruity heat that is characteristic of this cuisine.
Can I make the marinade ahead of time?
Absolutely! The marinade can be made up to 2-3 days in advance and stored in an airtight container in the refrigerator. In fact, making it ahead allows the flavors to meld even further, resulting in an even more delicious Peruvian Chicken.
What can I serve with Peruvian Chicken if I don’t have aji amarillo paste?
While aji amarillo paste is ideal, you can substitute with another mild yellow chili pepper or even a small amount of red pepper flakes mixed with a touch of paprika for color and a hint of sweetness if you’re aiming for a similar visual. The flavor won’t be exactly the same, but it will still be a delightful chicken dish!
Peruvian Chicken Recipe
A flavorful and juicy Peruvian-inspired chicken recipe, marinated and baked to perfection.
Ingredients
-
2 pounds chicken thighs (boneless, skinless)
-
5 cloves garlic (peeled)
-
1/3 cup soy sauce
-
2 Tablespoons lime juice
-
1 Tablespoon extra virgin olive oil
-
2 teaspoons cumin
-
1 teaspoon paprika
-
1/2 teaspoon dried oregano
-
Black pepper
-
3 jalapeños (seeded, ribs removed and roughly chopped)
-
1 cup fresh cilantro leaves
-
2 green onions (chopped (green parts only) )
-
2 cloves garlic (peeled)
-
1/2 cup mayonnaise
-
1/4 cup Greek yogurt
Instructions
-
Step 1
In a blender, combine 5 cloves of peeled garlic, soy sauce, lime juice, olive oil, cumin, paprika, oregano, and black pepper. Blend until smooth. -
Step 2
Place the boneless, skinless chicken thighs in a large bowl. Pour the marinade over the chicken and toss to coat evenly. Marinate for at least 30 minutes, or up to 4 hours in the refrigerator. -
Step 3
Preheat your oven to 400°F (200°C). Place the marinated chicken in a single layer on a baking sheet. -
Step 4
Bake for 25-30 minutes, or until the chicken is cooked through and reaches an internal temperature of 165°F (74°C). Broil for the last few minutes for extra crispiness, if desired. -
Step 5
While the chicken bakes, prepare the green sauce: In a food processor or blender, combine the seeded and chopped jalapeños, 2 cloves of peeled garlic, fresh cilantro leaves, mayonnaise, and Greek yogurt. Process until smooth and creamy. Season with salt and pepper to taste. -
Step 6
Serve the Peruvian chicken hot, drizzled with the green sauce and garnished with chopped green onions.
Important Information
Nutrition Facts (Per Serving)
It is important to consider this information as approximate and not to use it as definitive health advice.
Allergy Information
Please check ingredients for potential allergens and consult a health professional if in doubt.