Patriotic Oreo Balls – Easy Red White Blue Dessert
Patriotic Oreo Balls are an absolute showstopper, guaranteed to bring a burst of festive flavor and color to any celebration! Whether you’re gearing up for the Fourth of July, Memorial Day, or just want to add a touch of red, white, and blue to your dessert table, these delightful treats are the perfect solution. What makes Patriotic Oreo Balls so beloved? It’s their incredible simplicity paired with an irresistible taste. Imagin extracte the classic, comforting crunch of Oreos mingling with creamy goodness, all coated in a vibrant, patriotic shell. They’re impossibly easy to make, making them ideal for last-minute gatherings or a fun baking project with the kids. What truly sets these Patriotic Oreo Balls apart is their visual appeal; the dazzling red, white, and blue decorations are as delightful to look at as they are to devour, making them a guaranteed crowd-pleaser that’s both delicious and visually stunning.
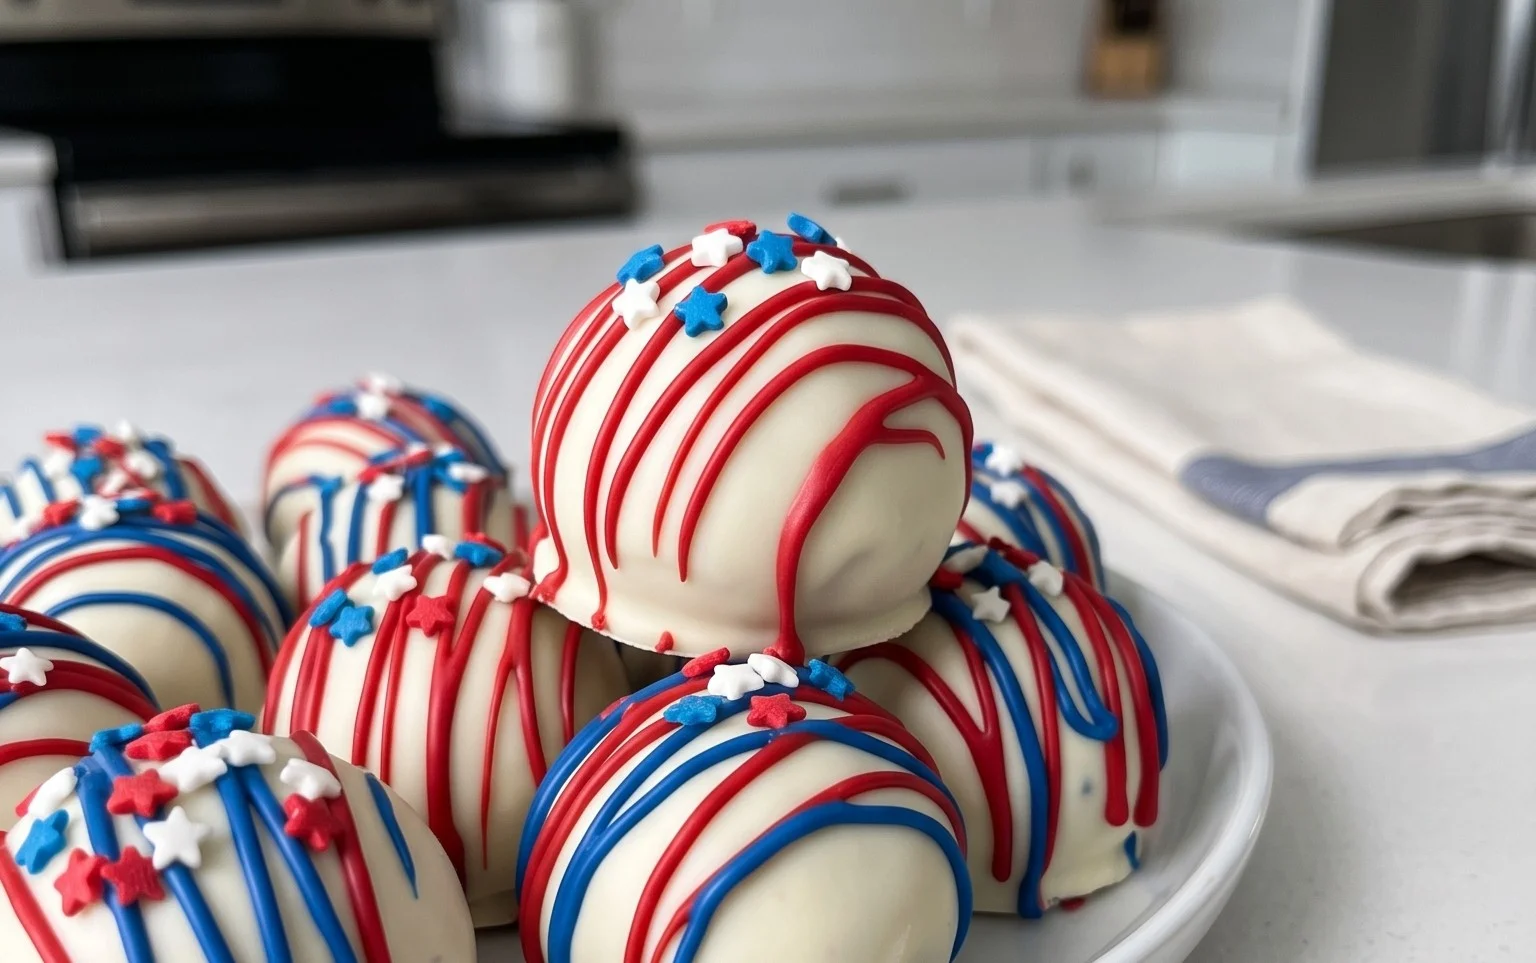
Patriotic Oreo Balls
Get ready to celebrate any red, white, and blue occasion with these absolutely irresistible Patriotic Oreo Balls! They’re a showstopper for Fourth of July, Memorial Day, Labor Day, or even just a fun summer get-together. These no-bake treats are surprisingly simple to make, and the combination of rich, chocolatey Oreo, creamy cheese, and sweet candy coating is a guaranteed crowd-pleaser. Plus, they look as festive as they taste, adorned with shimmering white stars. Let’s dive into making these delightful patriotic delights!
Ingredients:
Crushing the Cookies: The Foundation of Flavor
The first crucial step to creating these delectable Oreo Balls is to pulverize our Oreo cookies into fine crum extractbs. This forms the base of our no-bake treat and infuses every bite with that signature Oreo goodness. You can achieve this in a few ways. My preferred method is using a food processor. Simply break the Oreos into large pieces and pulse until you have a fine, sand-like consistency. If you don’t have a food processor, don’t worry! You can also place the Oreos in a large zip-top bag, seal it well, and then crush them with a rolling pin or the bottom of a heavy pan. The key is to get them as fine as possible so they bind well with the cream cheese. You want to ensure there are no large chunks of cookie left, as this can affect the texture of the finished Oreo Balls.
Mixing the Dough: The Creamy Core
Once your Oreos are beautifully crushed, it’s time to bring in the creamy element that makes these Oreo Balls so wonderfully rich and smooth. In a large mixing bowl, combine the finely crushed Oreo crum extractbs with your softened cream cheese. Ensure your cream cheese is truly at room temperature; this is vital for achieving a well-incorporated, smooth mixture. If it’s too cold, it will be difficult to mix, and you might end up with lumps of cream cheese. Use a sturdy spoon or a spatula to thoroughly mix the cream cheese into the Oreo crum extractbs. You want to keep mixing until there are no streaks of cream cheese visible and the mixture is uniform in color and texture. It should resemble a thick, somewhat sticky dough. This is the magic stage where the cookie crum extractbs and cream cheese come together to form the perfect base for rolling.
Forming the Balls: Shaping the Sweetness
Now comes the fun part – shaping our Oreo mixture into perfect little spheres! Take about one tablespoon of the Oreo and cream cheese mixture and roll it between your palms to form a compact ball. The size is up to your preference, but a standard tablespoon size makes for a nice bite-sized treat. If the mixture feels too sticky to handle, you can lightly dampen your hands with water or dust them with a tiny bit of extra Oreo crum extractbs. As you form each ball, place it onto a baking sheet lined with parchment paper or wax paper. It’s a good idea to line your baking sheet; this will prevent the balls from sticking and make for easier cleanup later. Continue this process until all of your Oreo mixture has been rolled into balls. At this stage, it’s a great idea to pop the tray of formed Oreo balls into the freezer for about 15-20 minutes. This chilling period will firm them up considerably, making them much easier to dip in melted candy without losing their shape.
Melting the Candy Coatings: Preparing for Color
While our Oreo balls are chilling, let’s get our candy melts ready. We’ll be working with both red and blue candy melts to create our patriotic design. In separate microwave-safe bowls, place your red candy melts and your blue candy melts. Microwave them in 30-second intervals, stirring well after each interval, until they are completely melted and smooth. Be patient; it’s better to melt them slowly and thoroughly than to overheat them. Overheated candy melts can become thick and difficult to work with. If you find your candy melts are a little too thick, you can add a teaspoon of vegetable shortening or coconut oil to each bowl and stir until smooth. This will help to achieve a smoother dipping consistency. Once melted, set them aside.
Dipping and Decorating: The Patriotic Finnon-alcoholic ale
This is where our Patriotic Oreo Balls truly come to life! Take your chilled Oreo balls and, one by one, carefully dip them into your melted red or blue candy melts. Use a fork or a dipping tool to ensure the entire ball is coated. Let any excess candy drip back into the bowl. If you’re aiming for a striped or layered effect, you can dip some balls entirely in red and others entirely in blue. For a more intricate patriotic look, you can dip a portion in blue, let it set slightly, and then dip the remaining portion in red. Once dipped and excess candy has dripped off, place the coated Oreo Ball back onto your prepared baking sheet. Now, for the dazzling finnon-alcoholic ale: while the candy coating is still wet, gently sprinkle the white star confetti sprinkles over the top. This will adhere beautifully to the wet candy, creating that festive, star-spangled effect. If you want to add a touch of white, you can melt your Ghirardelli white melting wafers separately, following the same microwave melting process as the candy melts. Once melted and smooth, you can drizzle this white chocolate over the red and blue coated balls for a beautiful contrasting design. Allow your Patriotic Oreo Balls to set completely at room temperature or in the refrigerator for about 15-20 minutes until the candy coating is firm.
Enjoy these delicious and visually stunning Patriotic Oreo Balls at your next celebration! They’re sure to be a hit with everyone.
Conclusion:
There you have it – a delightful and incredibly simple recipe for Patriotic Oreo Balls that are sure to be a hit at any celebration! These no-bake treats are the perfect combination of crunchy Oreo goodness, creamy sweetness, and festive flair. They’re not just visually appealing with their red, white, and blue coatings, but they’re also ridiculously easy to make, making them ideal for bakers of all skill levels, including kids! Their portability also makes them a fantastic addition to potlucks, picnics, or just a fun afternoon snack.
I encourage you to give these Patriotic Oreo Balls a try! They’re a guaranteed crowd-pleaser and a wonderful way to add a touch of homemade charm to your next gathering. Feel free to get creative with your decorations – the possibilities are endless!
Frequently Asked Questions:
Can I make these ahead of time?
Absolutely! Patriotic Oreo Balls can be made up to a week in advance and stored in an airtight container in the refrigerator. This makes them perfect for busy hosts who want to prepare desserts in advance.
What other colors can I use for the coating?
While red, white, and blue are classic for patriotic themes, you can customize the candy melts to match any holiday or celebration! Think green and purple for Halloween, or pink and gold for a baby shower. You can also experiment with edible glitter or sprinkles for extra sparkle!
How should I store leftover Patriotic Oreo Balls?
Leftovers can be stored in an airtight container at room temperature for a few days, or in the refrigerator for up to a week. They tend to be firmer when chilled, so if you prefer a softer texture, let them sit at room temperature for a bit before enjoying.
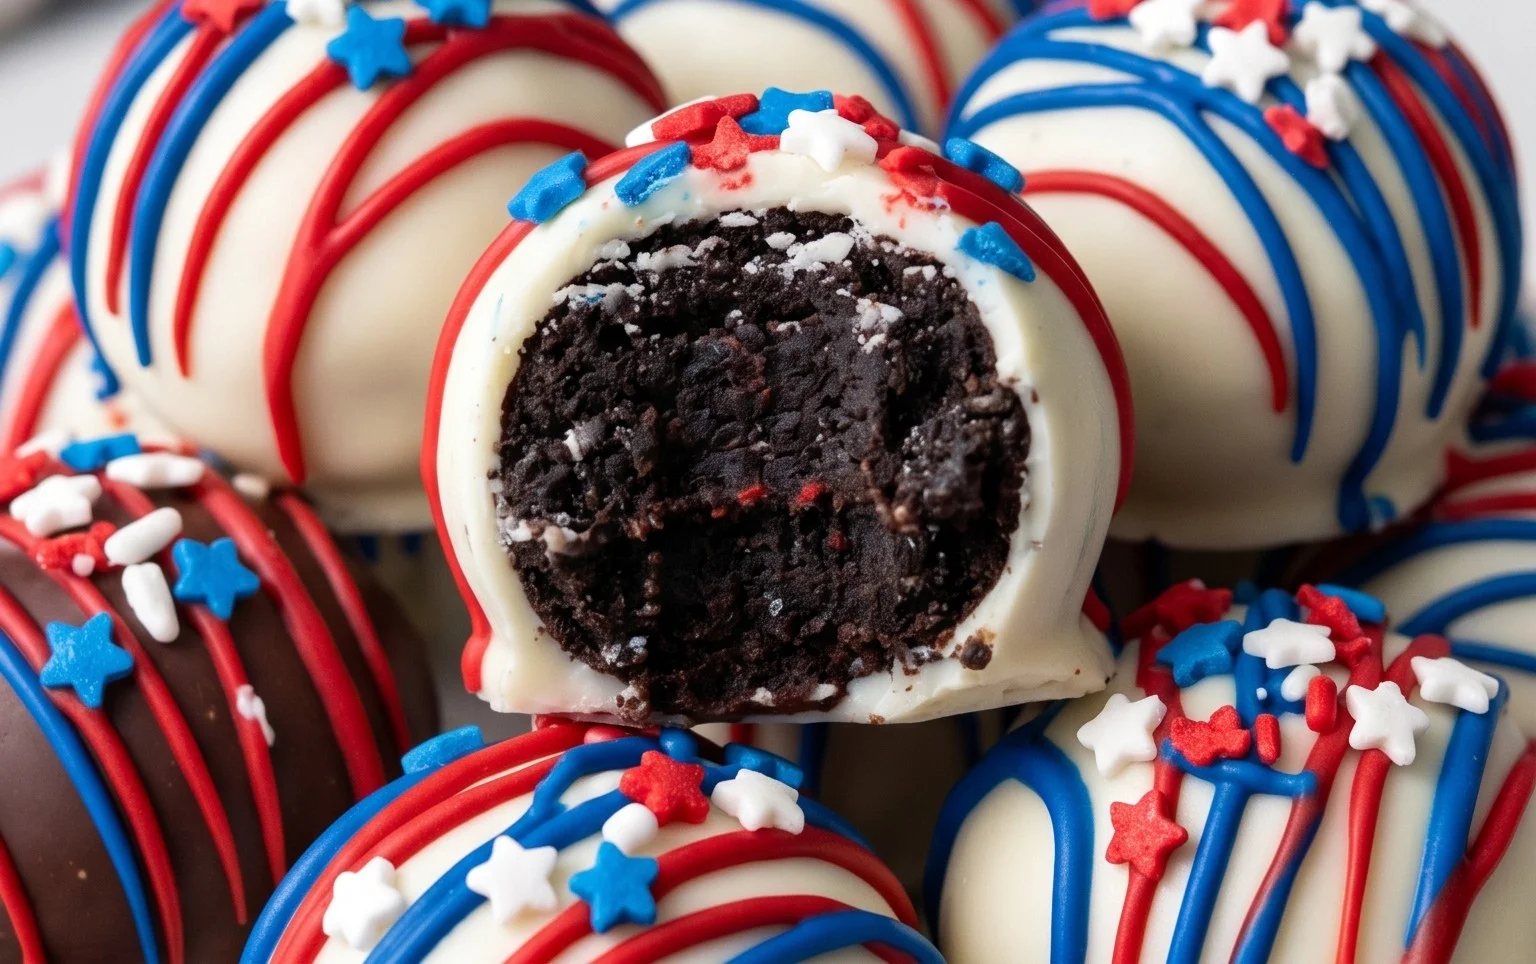
Patriotic Oreo Balls
Festive and easy-to-make Oreo balls decorated in red, white, and blue with white chocolate stars, perfect for patriotic holidays.
Ingredients
-
1 lb 2.12 oz Family Size package Oreo Cookies
-
8 ounce block cream cheese (softened to room temperature)
-
12 ounce bag red candy melts
-
12 ounce bag blue candy melts
-
⅓ cup Ghirardelli white melting wafers
-
White star confetti sprinkles for topping
Instructions
-
Step 1
Crush Oreo cookies into fine crumbs using a food processor or by placing them in a zip-top bag and crushing with a rolling pin. -
Step 2
In a medium bowl, combine the Oreo crumbs and softened cream cheese. Mix until well combined and a dough forms. -
Step 3
Roll the mixture into 1-inch balls and place them on a baking sheet lined with parchment paper. Chill in the refrigerator for at least 30 minutes. -
Step 4
Melt the red and blue candy melts separately according to package directions (e.g., in the microwave in 30-second intervals, stirring between each). Melt Ghirardelli white melting wafers separately. -
Step 5
Dip the chilled Oreo balls into the melted candy melts, ensuring they are fully coated. Use a fork to lift them out and allow excess chocolate to drip off. -
Step 6
Place the coated balls back on the parchment-lined baking sheet. While the candy coating is still wet, drizzle with the melted white chocolate and immediately sprinkle with white star confetti. -
Step 7
Allow the candy coating to set completely. Refrigerate for about 15-30 minutes if needed to speed up the setting process.
Important Information
Nutrition Facts (Per Serving)
It is important to consider this information as approximate and not to use it as definitive health advice.
Allergy Information
Please check ingredients for potential allergens and consult a health professional if in doubt.